- Created by Kyle , last modified on May 29, 2024
You are viewing an old version of this content. View the current version.
Compare with Current View Version History
« Previous Version 5 Next »

Getting Started
Card : Quick Start
Card: Interacting with the CVT
Networking Requirements
By the end of this guide you will have a clear idea of how to start a new project with the Collab Viewer Template using the Cavrnus platform. This page will walk you through how to configure a new Collab Viewer Template project, package the project for synchronized copresence, and navigate the interactive options within the scene, facilitating the connection of multiple participants through a remote network to the same collaborative Space.
CMC-CVT Workflow
Download the CMC-CVT sample project from the Cavrnus Web Console.
The template includes the same content as the AEC Collab Viewer template.
The Cavrnus Metaverse Connector has been added to power advanced functionality.
Create a new level using your own content and UI configuration.
The downloadable template is preconfigured with the plugin. Replacing the scene with your content is the fastest path to a collaborative session.
Package the project to a distributable executable file (*.exe).
Each person who who joins your collaborative Space will need to run a duplicate application of your project.
While it is possible for each user to package their own build and still connect within the Space, there will be fewer chances for errors if one member of the team packages the project and distributes copies of the executable.
There are no configuration requires to package the project beyond activation of the Cavrnus plugin (already done from step 1). Simply follow the Epic standard workflow for Packaging Projects.
As with a standard Collab Viewer project, each person who joins the Space will need all of the files in the executable folder.
For more information about packaging, and how you can configure the process, see also Packaging Projects .
Connecting to a Space
To connect your team members in a collaborative session, you first create a Space for everyone to join.
Make sure your team members have access to your domain and assign them roles within the new Space.
Users will then see the Space in the Cavrnus Lobby when they login to the distributed application.


Navigating a Collaborative Space
Once the team is in the Space, you may see a User List on the right side of the screen with image thumbnails, audio, and screen-sharing controls.
You can toggle this on and off using the F10 key.

From here, the standard CVT controls should look familiar, and will continue to operate the same way with additional Cavrnus functionality on top.
Making Changes to a Collaborative Space
One key difference when using the Cavrnus platform is the persistent tracking of states within a unique Space.
Every change you make is logged to the Journal in real-time. There is no need to click a “Save” button.
Changes are persistently available even after all members leave the Space. When a team member loads the project back into that Space, they will find everything exactly where it was left when the last changes were made.
With Cavrnus, you can have an unlimited number of Spaces, so multiple configurations can be stored and reviewed.
Just as before, you can store a state using the default Collab Viewer Template interface. This will move everything to the stored states and update the Journal.
Objects can also be added and removed from the scene to customize the Space.
Add new models to the scene using the Holos format. Holos added this way are pushed to other users and are visible only in the Space in which they were added.
In the same way, boards can be added for display purposes. (See Boards).
The state of all of the objects in the Space can be managed using the the Cavrnus object list.

2 - One Person Starts a Server
In this step, you'll start up a server—a special instance of the Collab Viewer application that other people can connect to.
Double-click the .exe file for your packaged application.
In the example below, the Project is named CollabProject , so its packaged application is named CollabProject.exe .In the welcome screen, set a display name for yourself. This name appears above the head of your avatar, so that other people in the same session can identify you.
Click the arrow to go to the next step.
Leave the next setting at its default value of Host a session .
Click the arrow to complete the server setup.
If you only want to use the Collab Viewer Template to make a single-person experience without the ability for other users in your network to join in, you could instead choose the Single Session option here. It gives you exactly the same runtime experience as starting as a host, except that your application doesn't become visible to other people in your network.


You'll start in the main sample Level.

Use the desktop controls or VR controls to move around the scene and interact.
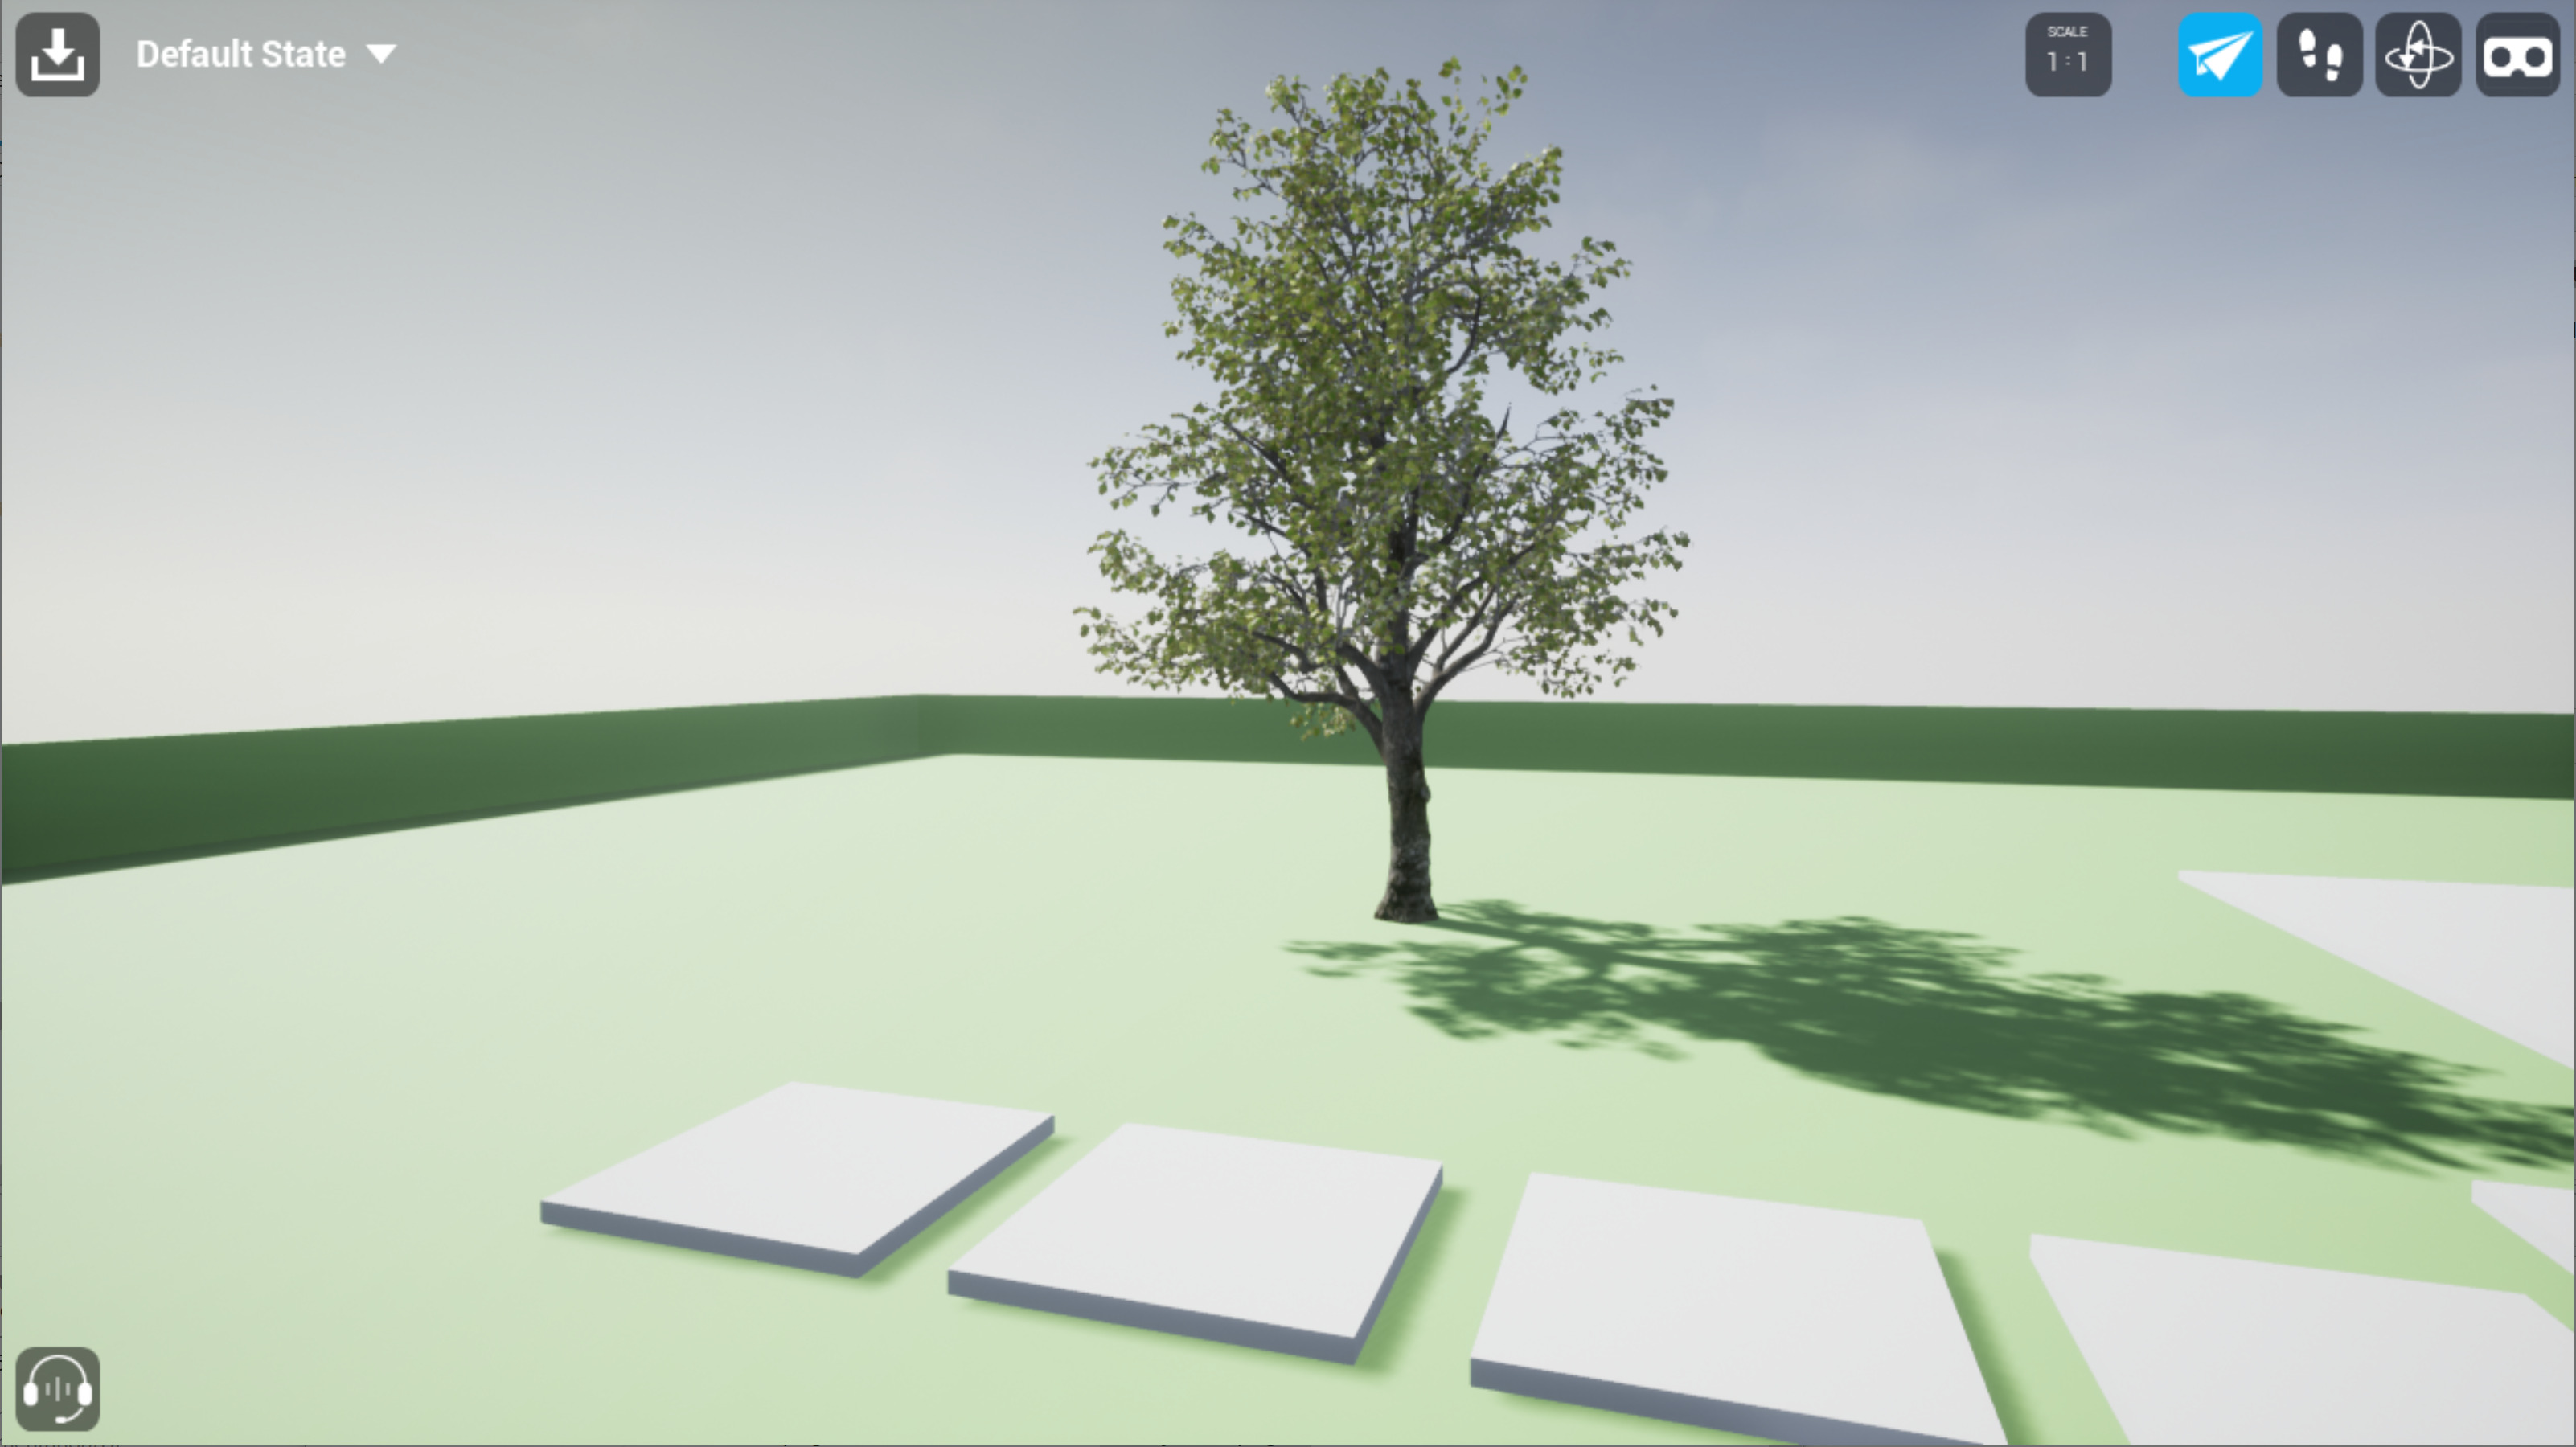
You can press the Spacebar key (or either thumbstick button in VR) to open an Interaction Menu that lets you make selected objects transparent ( Xray ), teleport to preset Bookmark locations, move objects around in 3D space, scale your viewpoint, cut and remove a section of the geometry, or load new Datasmith assets during runtime.
You can also use the menu at the top right to switch between different movement modes—fly, walk, orbit—and, if you have a compatible VR headset set up, to switch into VR.


To learn more, see:
While you're working, your computer becomes visible as a server to other computers in your network. As other people join your session, you'll see their avatars appear.
Finished Step
3 - Other People Join
In this step, each person who joins the session launches a separate instance of the packaged application on a different computer, and they all connect to the same server.
Each individual should follow these instructions to join the session:
Double-click the .exe file for your packaged application. For example, in this case, the Project is named CollabProject , so its packaged application is named CollabProject.exe .
In the welcome screen, set a display name for yourself. This name appears above the head of your avatar, so that other people in the same session can identify you.
Click the arrow to go to the next step.
Change the next setting to Join a session .
Click the arrow to go to the next step.
The application scans the network, and lists all available servers.
If you see the server you want in the list, click its name to join the session.
If you don't see the server you want, try the Refresh button to re-scan the network for servers.
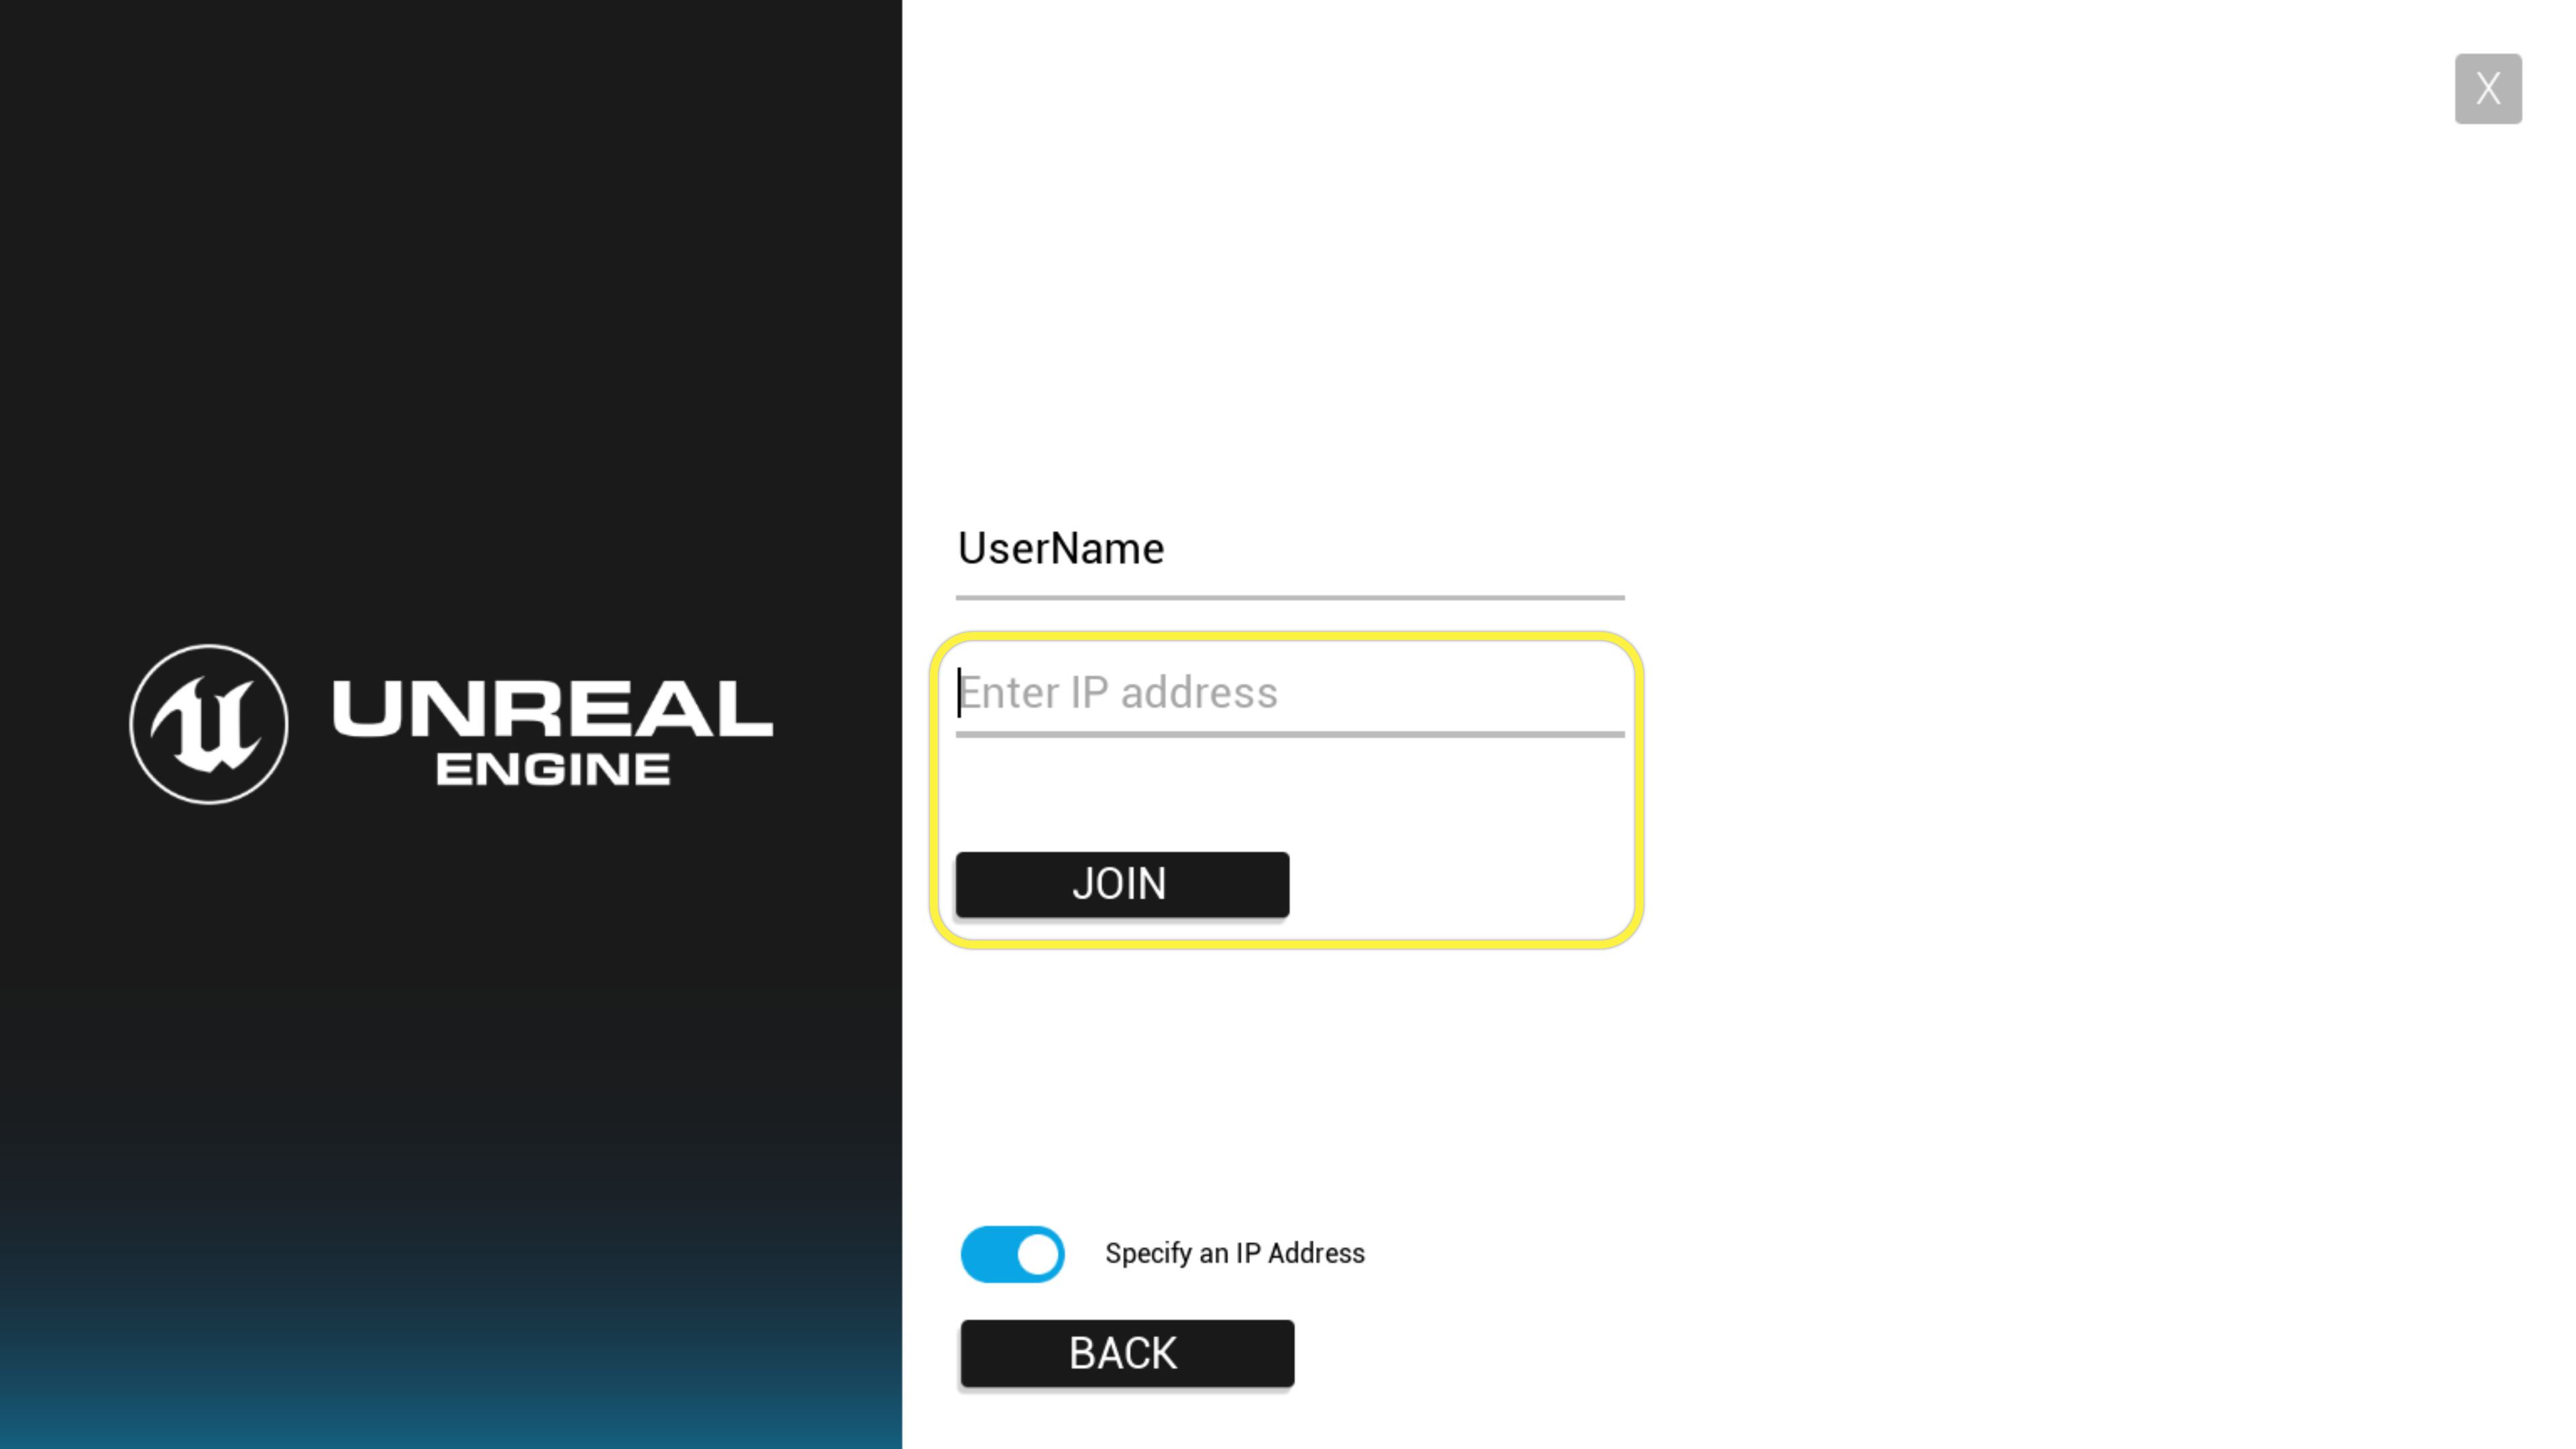
If the application can't detect the server, but you know its IP address, activate the Manually specify an IP Address switch.
Enter the IP address in the field provided, and click Join .


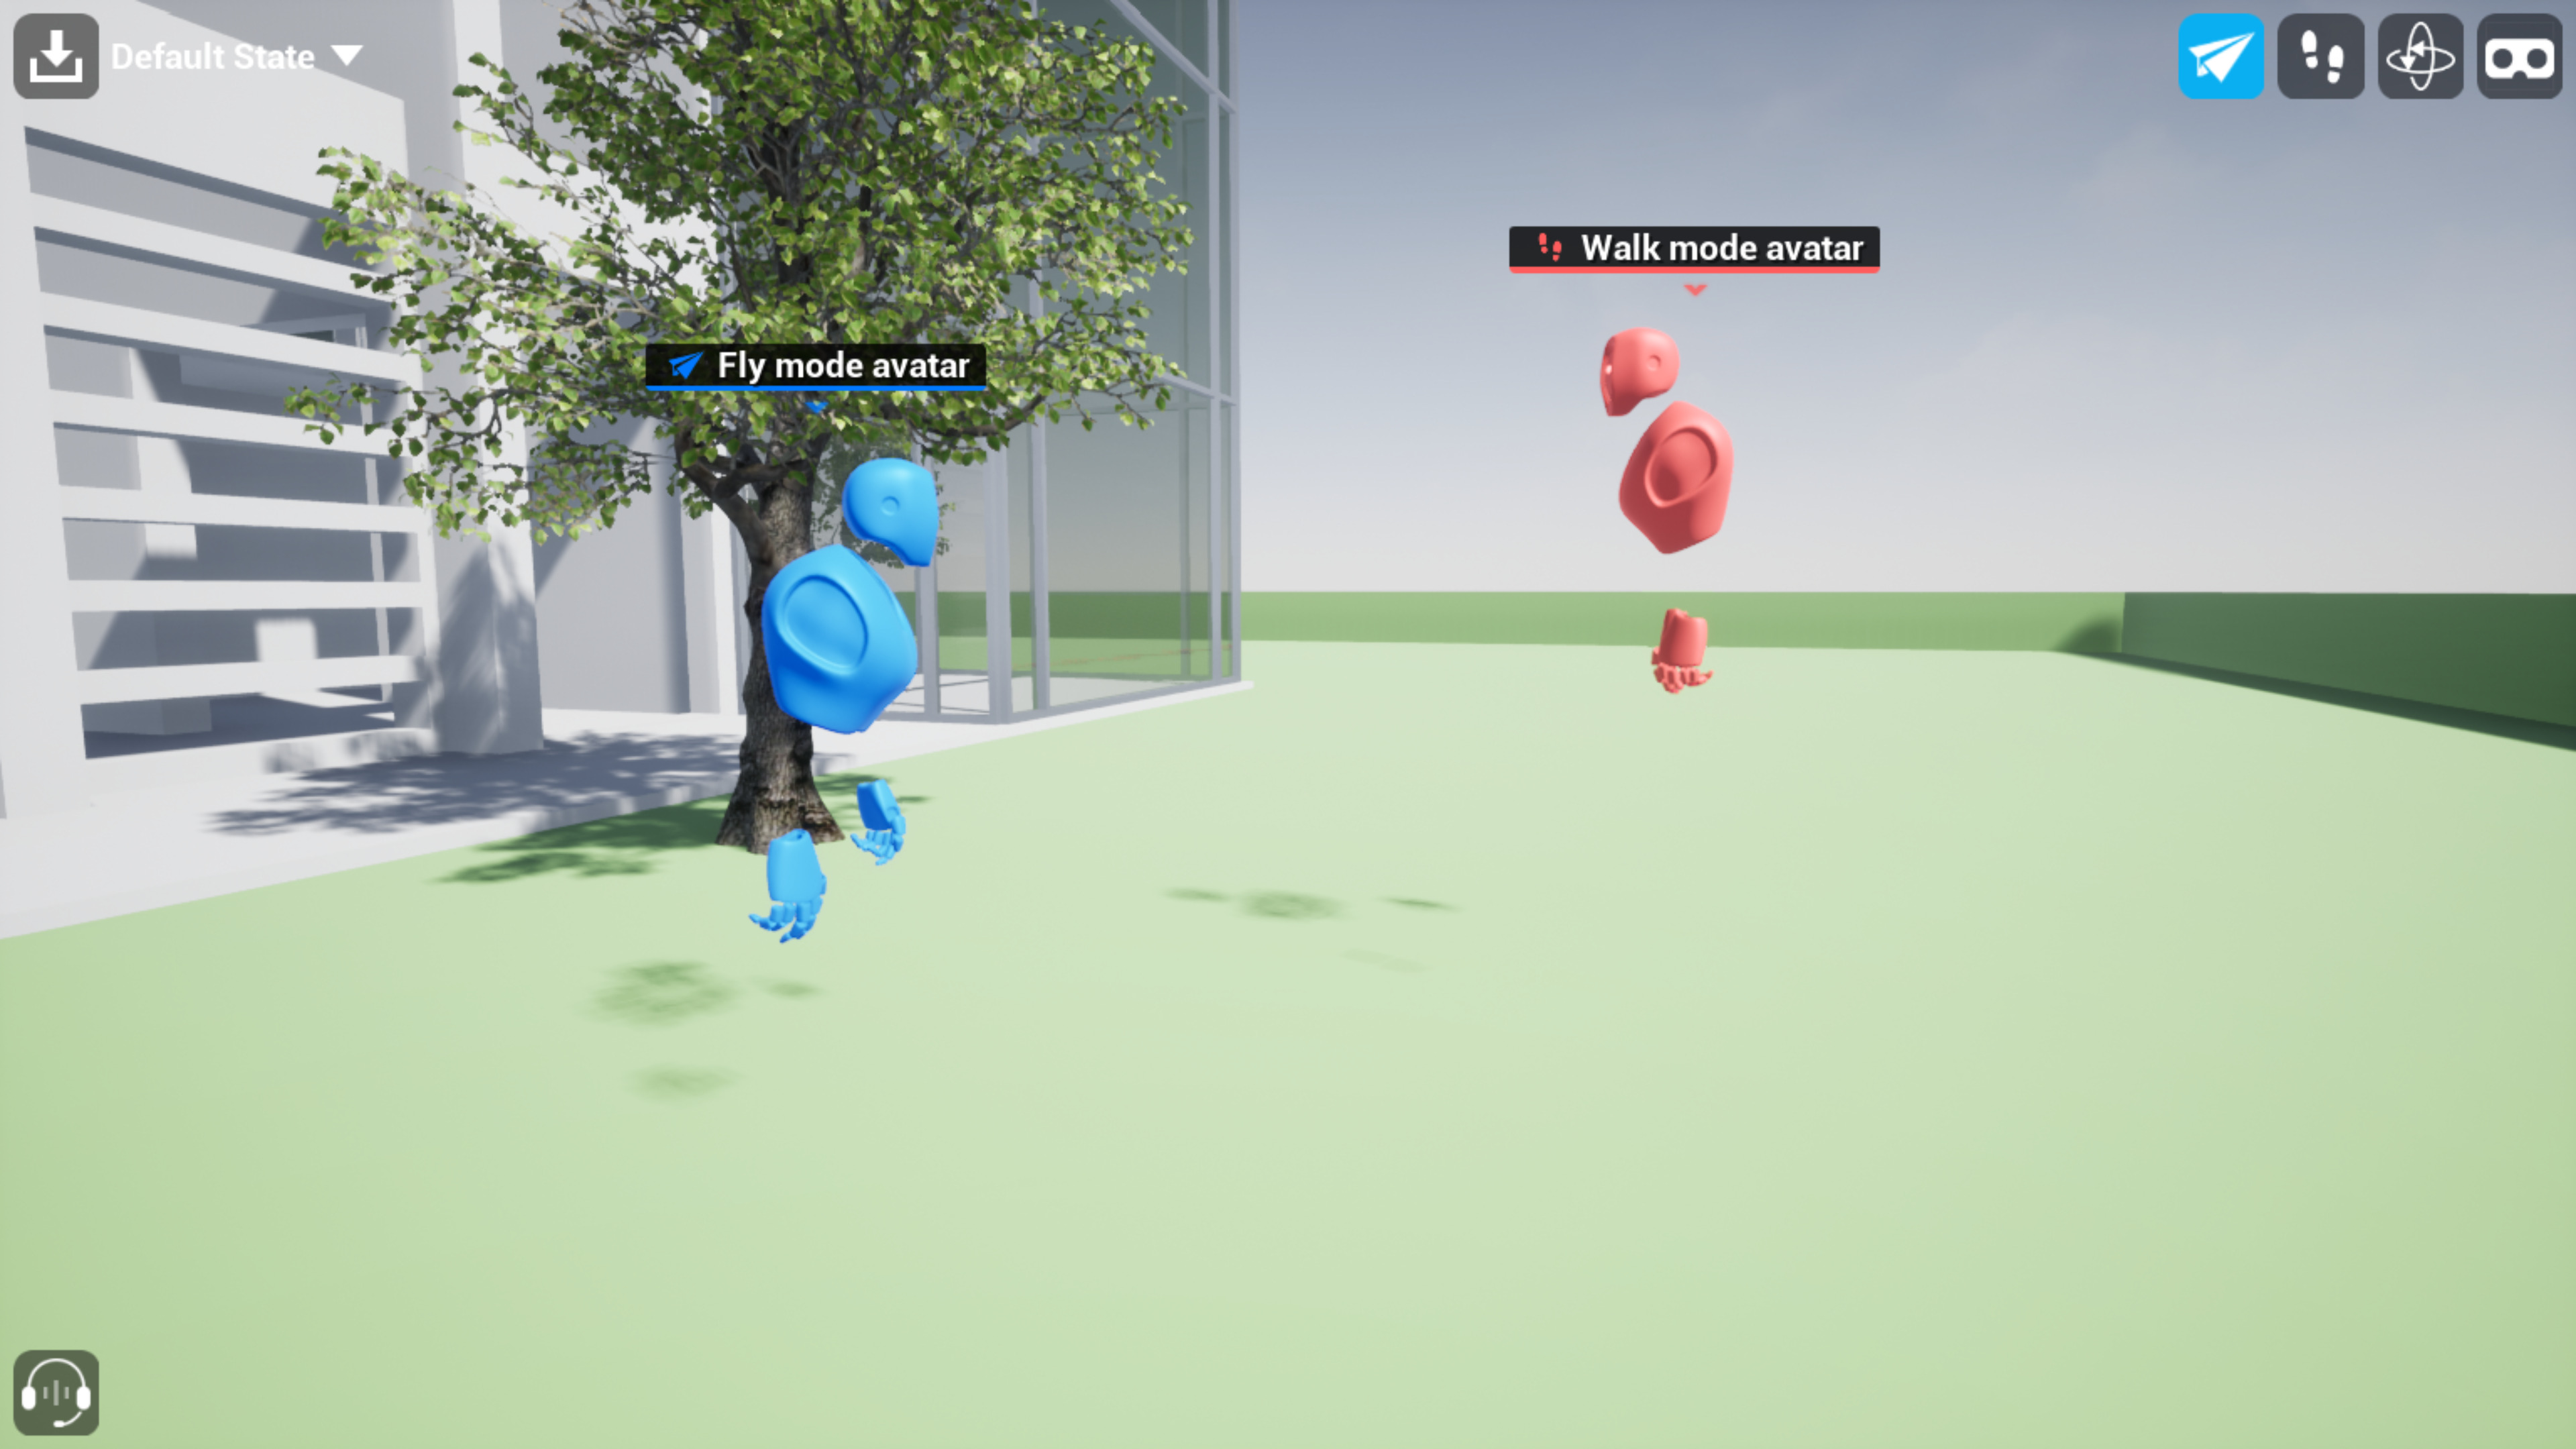
You'll start in the main Level. You'll be able to see an avatar for the person running the server, and one for each other person who joins the session:

The avatars are slightly different for each user:
Each avatar is accompanied by the display name its user entered in the welcome menu.
Each avatar is assigned a random color.
Users in the Walk and VR modes have an avatar that resembles a human shape as on the right in the image above. Users in other navigation modes are represented by a camera as on the left in the image above.
All avatars move and rotate around the scene as their corresponding user moves and looks around, so that you can see where other users are focusing their attention.
Use the desktop controls or VR controls to move around the scene and interact.
Finished Step
4 - On Your Own
Now that you understand how to run the Collab Viewer Template and connect with others, you're ready to get started using the same runtime experience to review your own content. Continue on with the instructions in the Adding Your Own Content to the Collab Viewer Template guide for instructions on getting your own content added to the Project and set up to work in the same runtime experience.
For more information about getting started with the standard Collab Viewer Template, check out the Epic Unreal Engine Documentation.
ON THIS PAGE
- No labels