Versions Compared

Key

  • This line was added.
  • This line was removed.
  • Formatting was changed.
Warning

DO NOT POST LIVE!!!
This is still in development.

collabviewer-Interaction.pngImage Removed

Describes requirements and considerations that apply when you connect multiple computers together into a design review experience.

Getting Started

Warning

NOTES FROM THE UE WEBSITE - REMOVE BEFORE PUBLISHING!

 This page contains detailed, step-by-step instructions for getting started with the Collab Viewer Template on your local network with its default content. By the end of this page, you'll know how to start up the runtime experience the Collab Viewer Template provides for you, what your options are for interacting and moving around the scene, and how to get multiple other people on your network to join the same shared experience with you.

The workflow here uses the AEC Collab Viewer template as an example, but the workflows function equally well for the OEM/Manufacturing template.

1 - Packaging and Distributing

To take advantage of all the features of the Collab Viewer Template, you'll first need to package your Project to an .exe file. When you want multiple people to connect to a single session, each person needs to run the application from a copy of that packaged .exe file. Therefore, one person on the team needs to package the Project from the Unreal Editor, then distribute that .exe file to everyone else who you need to join the same session.

To package and share your Project:

  1. Create a new Project from the Collab Viewer Template, if you haven't already, and open it in the Unreal Editor.

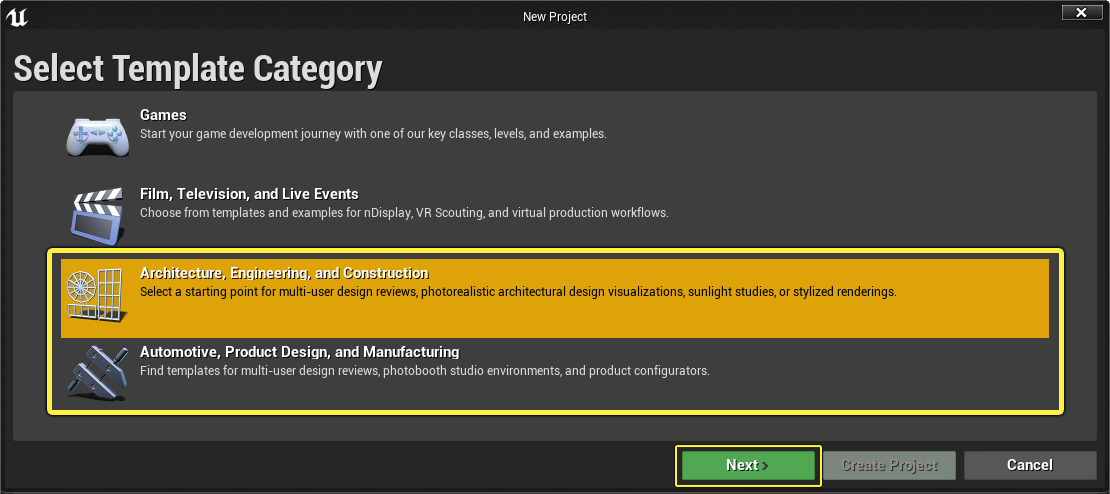
  2. Select a template category.

  3. Select the Collab Viewer template.

  4. Select Create Project .

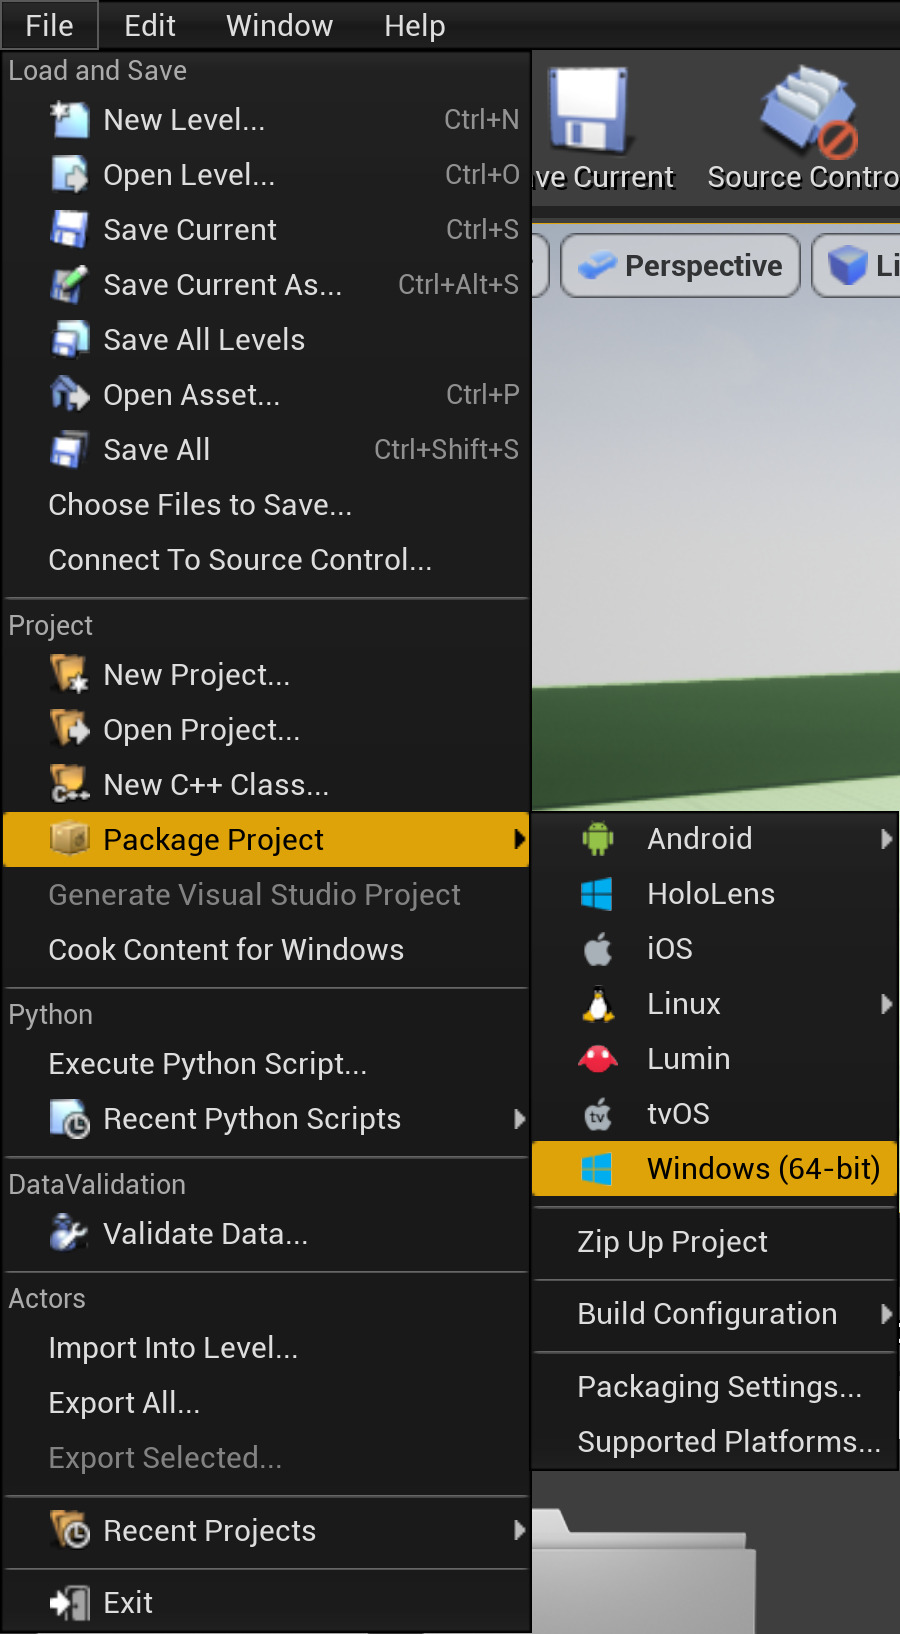
  5. From the main menu, choose File > Package Project > Windows (64-bit).


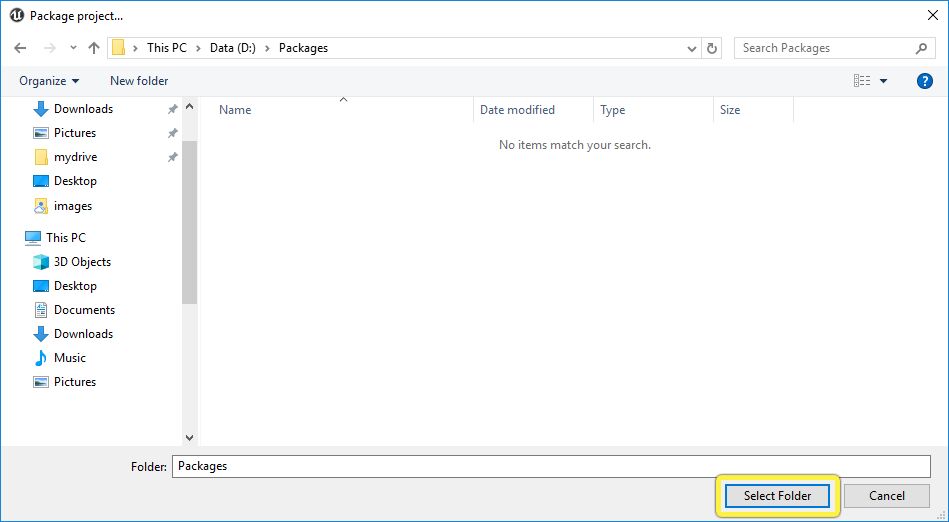
  6. Browse to the folder on your computer where you want the Unreal Editor to place the packaged version of your Project, and click Select Folder .

    The Unreal Editor begins the packaging process.

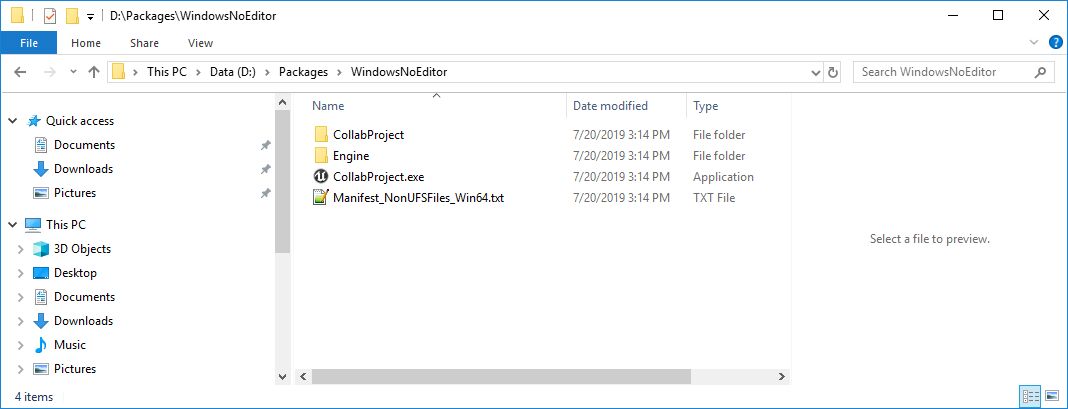
  7. When the packaging process is finished, go to the folder that you selected in step 3 above. You'll find a folder called WindowsNoEditor with contents similar to the following:

    Each person who wants to join the same session in the Collab Viewer will need to have all of the files in this folder on their local computer. It's up to you how best to achieve this for your organization.
    For example, you could zip up the files in this folder and place the archives in a shared location on your local network. Other users could then copy them to their computer and extract them.

Package contentsImage RemovedPackaging progressImage RemovedSelect a folderImage RemovedPackage for Windows 64-bitImage RemovedSelect a template categoryImage Removed

For more information about packaging, and how you can configure the process, see also Packaging Projects .

You must follow this packaging and distribution process each time you change the content in your Project. The 3D models in your Level are not replicated automatically between networked users; they are compiled into the packaged application. In order for everyone in a session to see the latest content, everyone needs to be using the same version of the packaged application.

Finished Step

2 - One Person Starts a Server

In this step, you'll start up a server—a special instance of the Collab Viewer application that other people can connect to.

  1. Double-click the .exe file for your packaged application.
    In the example below, the Project is named CollabProject , so its packaged application is named CollabProject.exe .

  2. In the welcome screen, set a display name for yourself. This name appears above the head of your avatar, so that other people in the same session can identify you.

    Click the arrow to go to the next step.

  3. Leave the next setting at its default value of Host a session .

    Click the arrow to complete the server setup.

    If you only want to use the Collab Viewer Template to make a single-person experience without the ability for other users in your network to join in, you could instead choose the Single Session option here. It gives you exactly the same runtime experience as starting as a host, except that your application doesn't become visible to other people in your network.

Host a sessionImage RemovedSet a display nameImage RemovedPackaged executableImage Removed

You'll start in the main sample Level.

Server session openedImage Removed

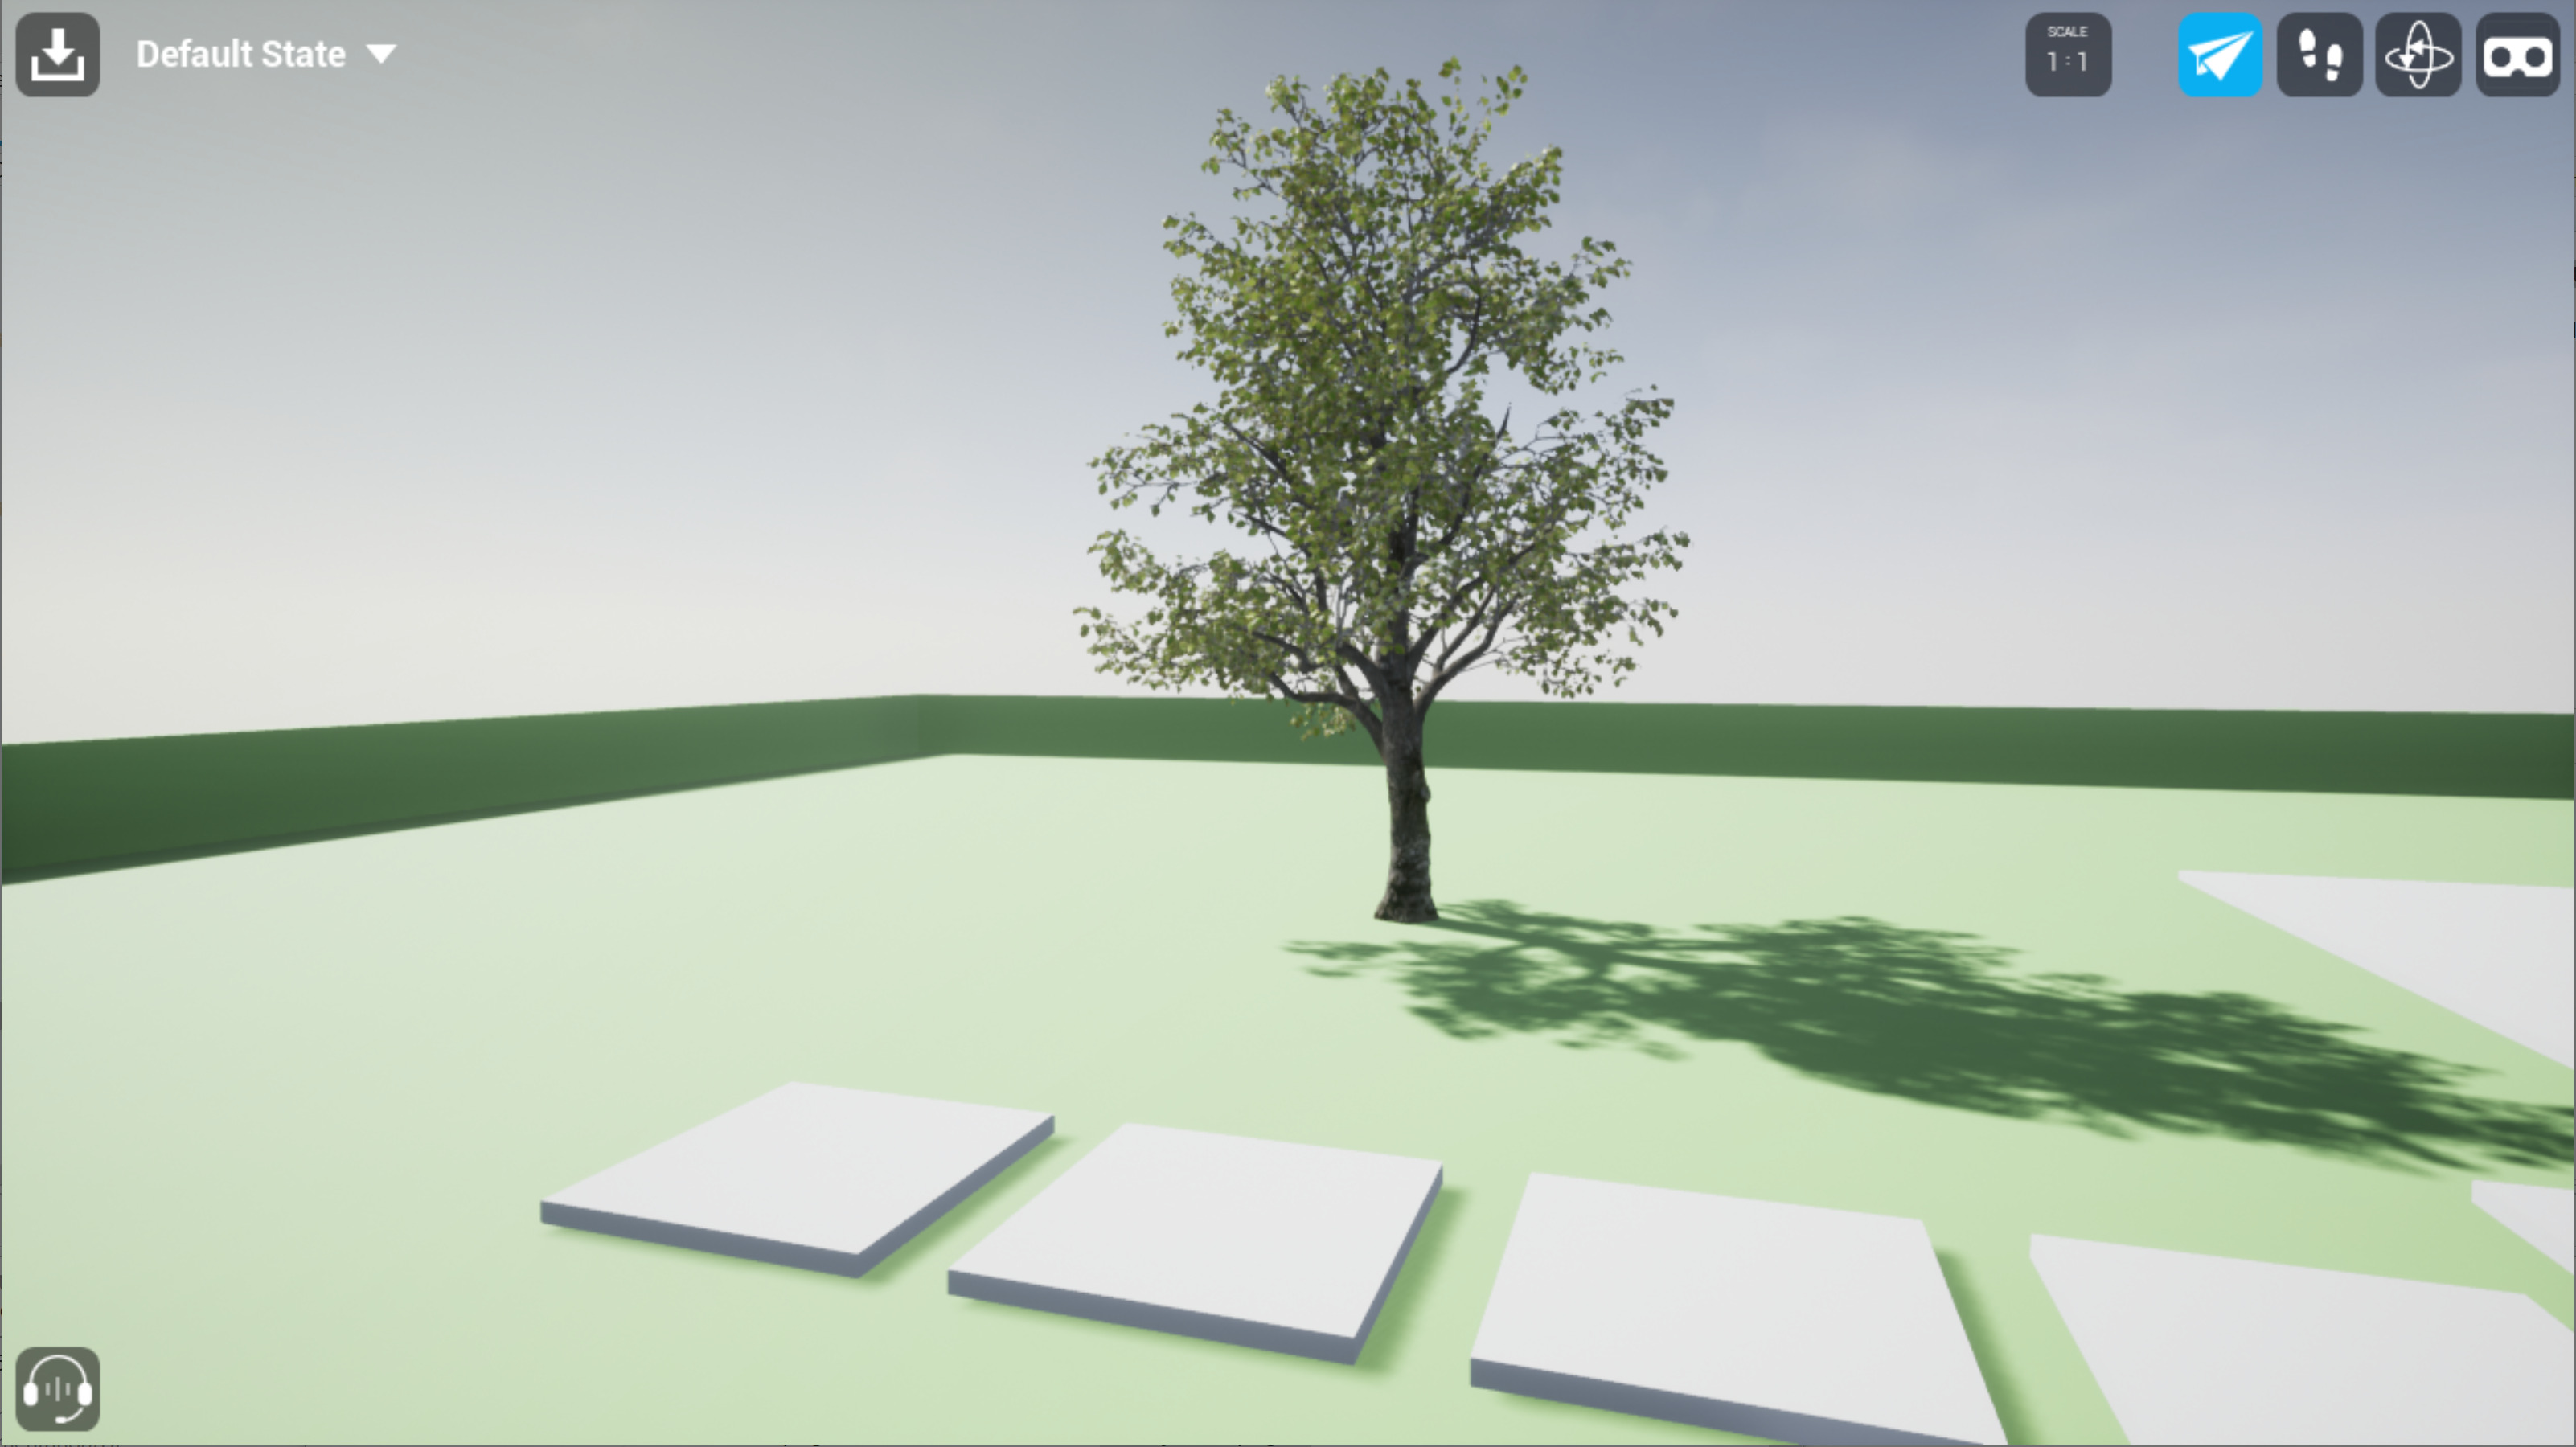
Use the desktop controls or VR controls to move around the scene and interact.

  • You can press the Spacebar key (or either thumbstick button in VR) to open an Interaction Menu that lets you make selected objects transparent ( Xray ), teleport to preset Bookmark locations, move objects around in 3D space, scale your viewpoint, cut and remove a section of the geometry, or load new Datasmith assets during runtime.

  • You can also use the menu at the top right to switch between different movement modes—fly, walk, orbit—and, if you have a compatible VR headset set up, to switch into VR.

ToolbarImage RemovedInteraction MenuImage Removed

To learn more, see:

While you're working, your computer becomes visible as a server to other computers in your network. As other people join your session, you'll see their avatars appear.

Finished Step

3 - Other People Join

In this step, each person who joins the session launches a separate instance of the packaged application on a different computer, and they all connect to the same server.

Each individual should follow these instructions to join the session:

  1. Double-click the .exe file for your packaged application. For example, in this case, the Project is named CollabProject , so its packaged application is named CollabProject.exe .

  2. In the welcome screen, set a display name for yourself. This name appears above the head of your avatar, so that other people in the same session can identify you.

    Click the arrow to go to the next step.

  3. Change the next setting to Join a session .

    Click the arrow to go to the next step.

  4. The application scans the network, and lists all available servers.

    • If you see the server you want in the list, click its name to join the session.

    • If you don't see the server you want, try the Refresh button to re-scan the network for servers.

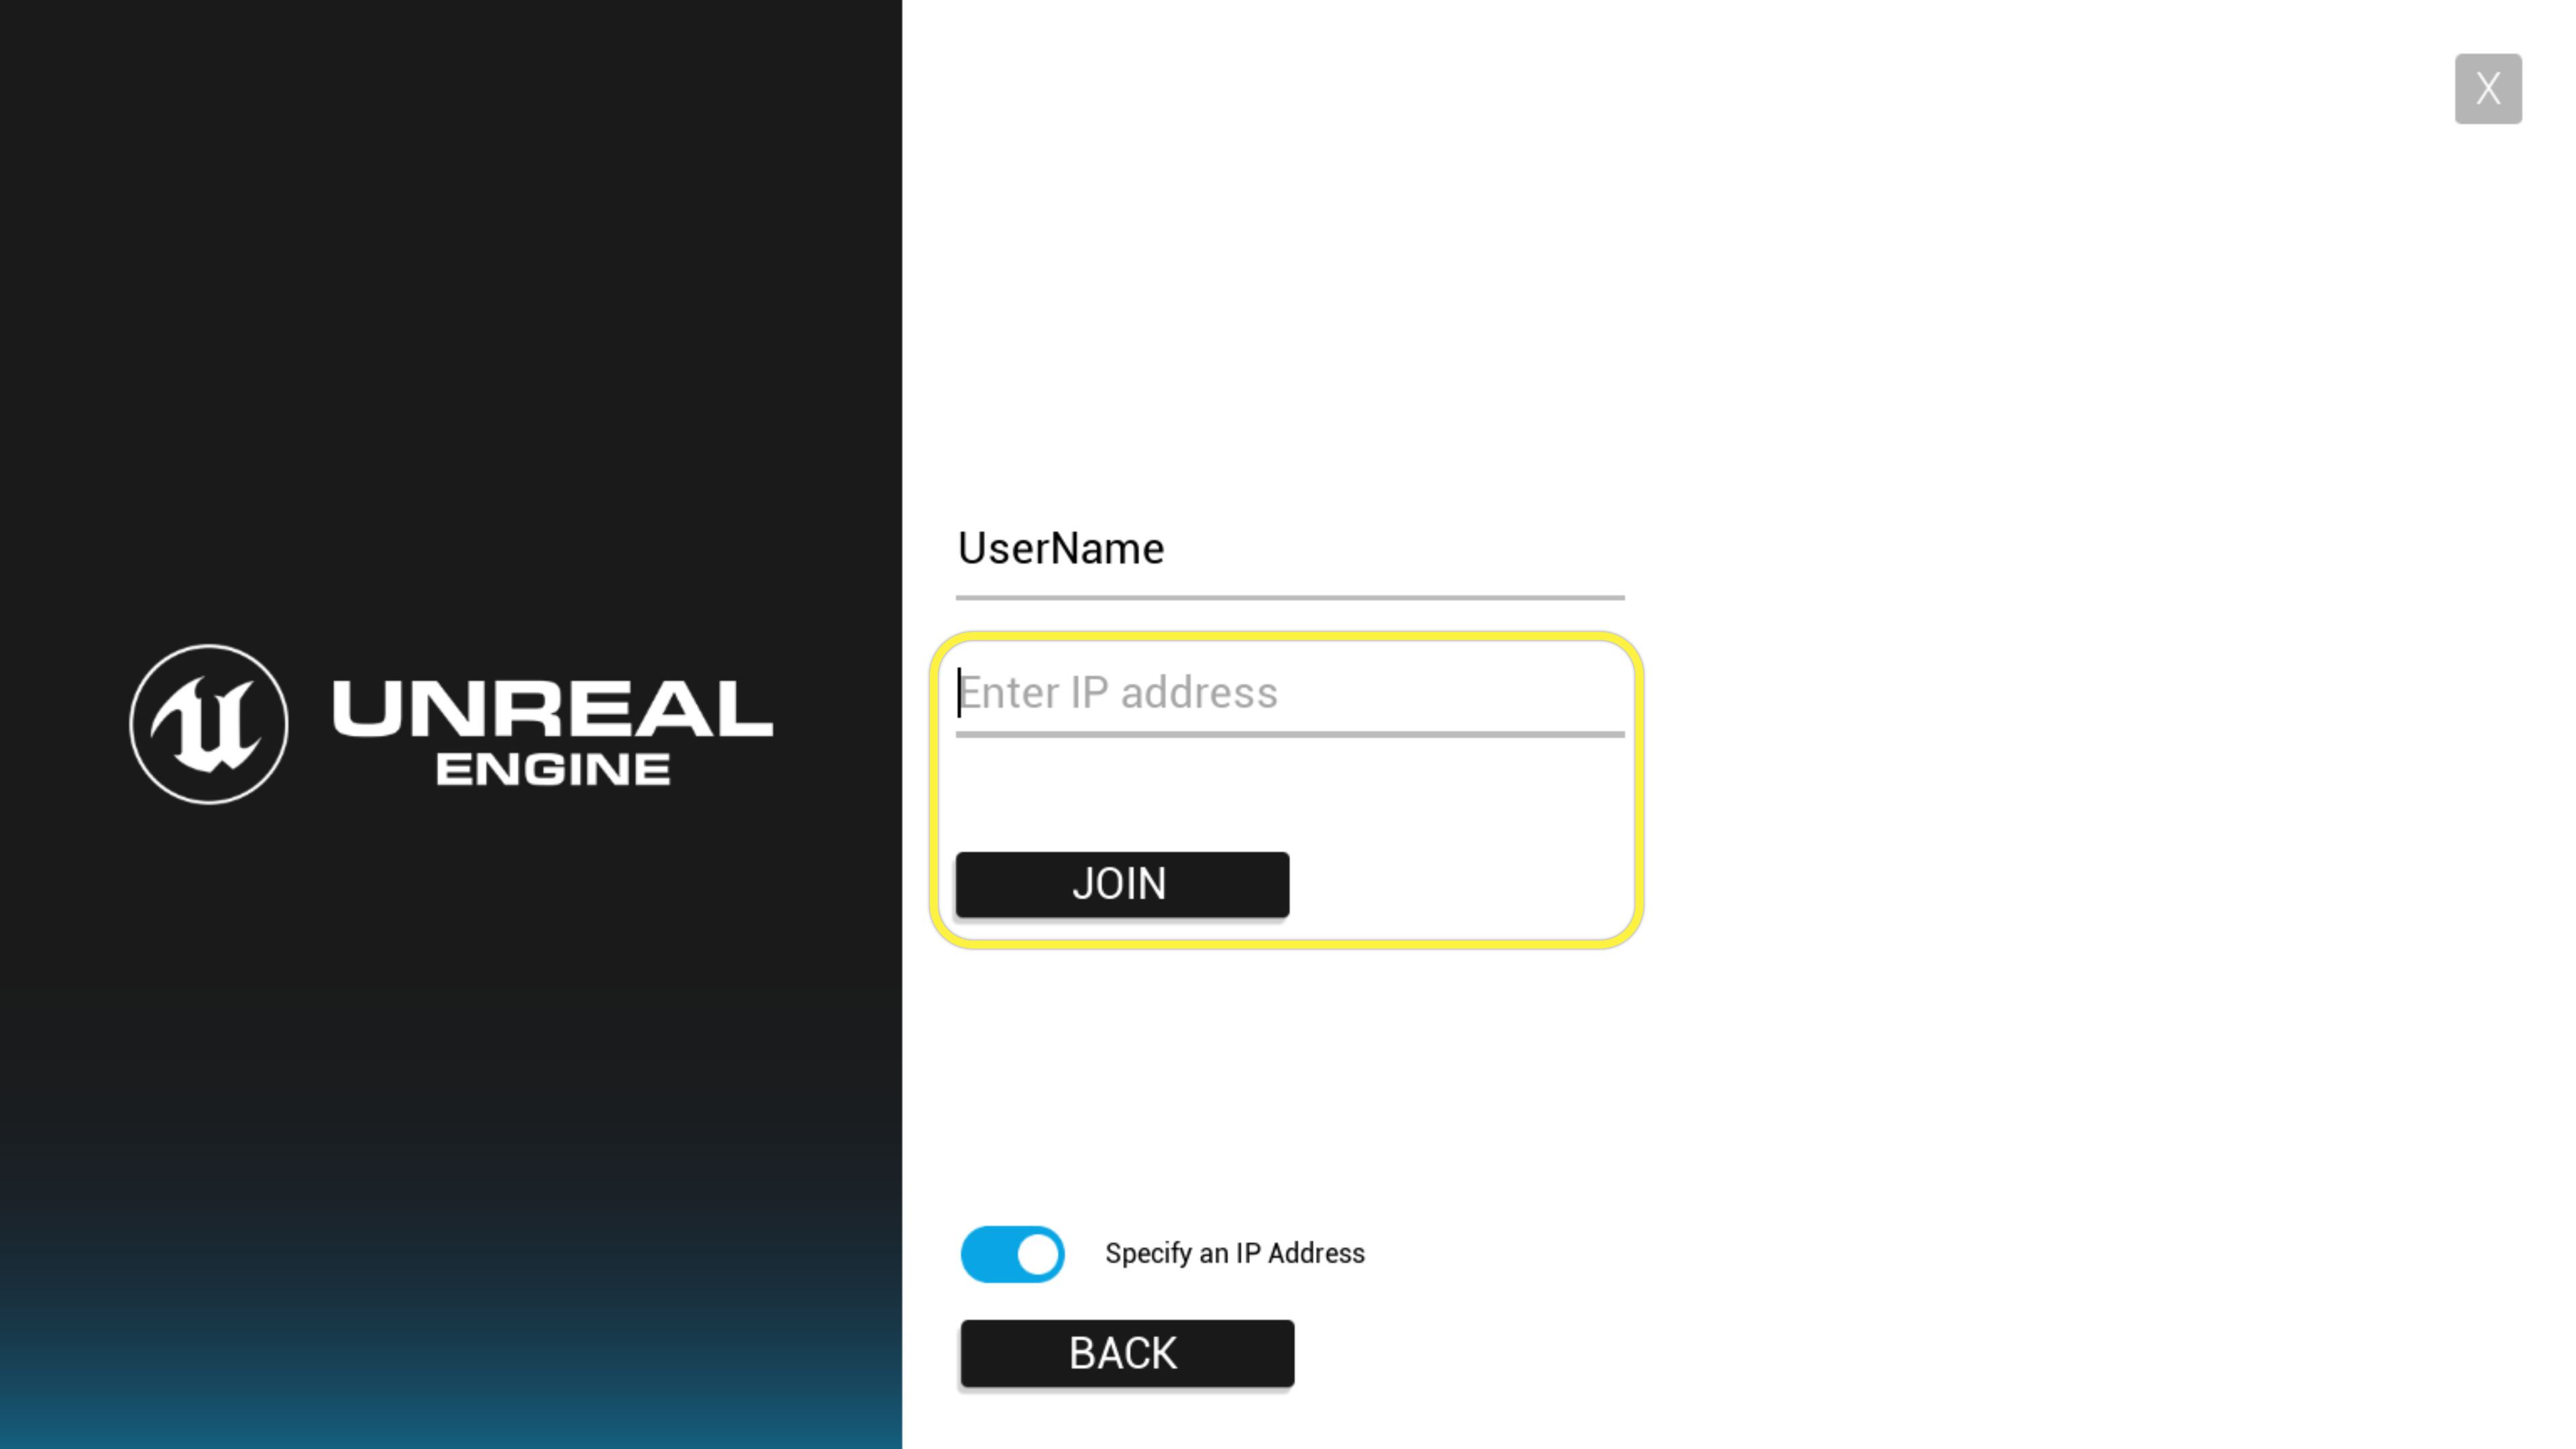
    • If the application can't detect the server, but you know its IP address, activate the Manually specify an IP Address switch.

      Enter the IP address in the field provided, and click Join .

Enter server IP Address and joinImage RemovedSwitch to manual IP modeImage RemovedRefresh the list of serversImage RemovedClick the server nameImage RemovedSelect a server to joinImage RemovedChoose Join a sessionImage RemovedSet a display nameImage RemovedPackaged executableImage Removed

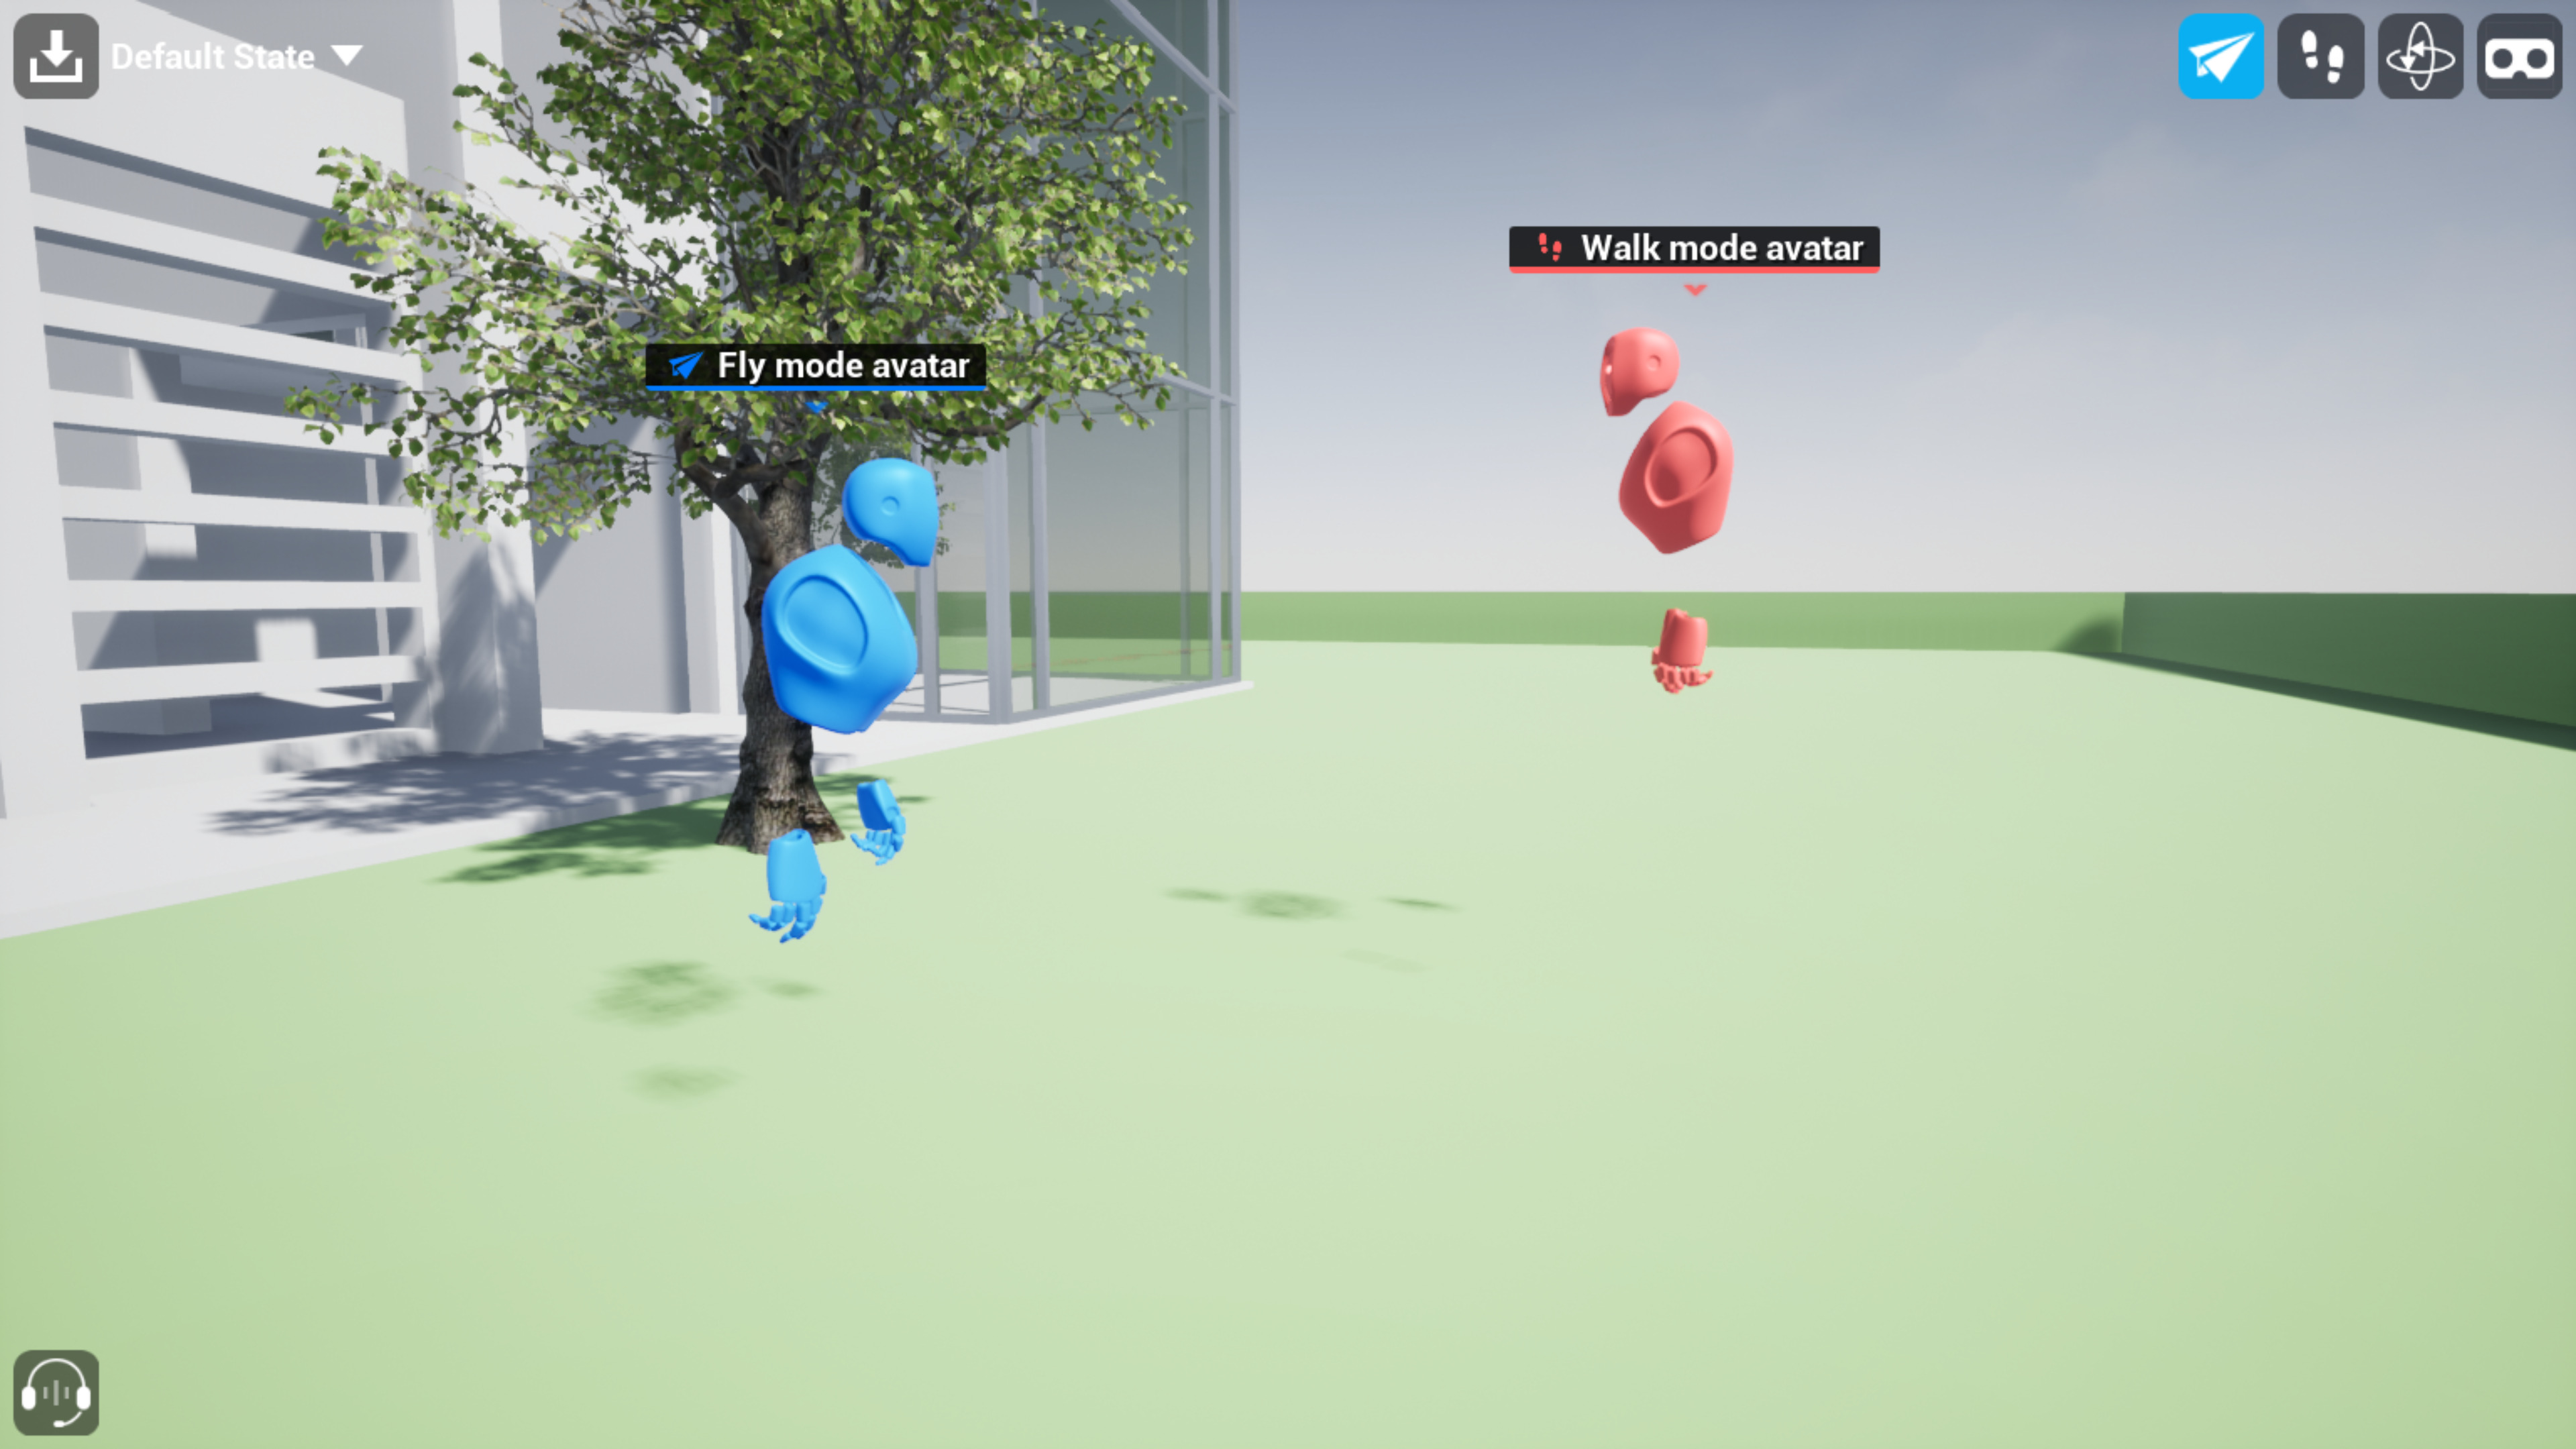
You'll start in the main Level. You'll be able to see an avatar for the person running the server, and one for each other person who joins the session:

collabviewer-client-joined.pngImage Removed

The avatars are slightly different for each user:

  • Each avatar is accompanied by the display name its user entered in the welcome menu.

  • Each avatar is assigned a random color.

  • Users in the Walk and VR modes have an avatar that resembles a human shape as on the right in the image above. Users in other navigation modes are represented by a camera as on the left in the image above.

  • All avatars move and rotate around the scene as their corresponding user moves and looks around, so that you can see where other users are focusing their attention.

Use the desktop controls or VR controls to move around the scene and interact.

Finished Step

4 - On Your Own

Now that you understand how to run the Collab Viewer Template and connect with others, you're ready to get started using the same runtime experience to review your own content. Continue on with the instructions in the Adding Your Own Content to the Collab Viewer Template guide for instructions on getting your own content added to the Project and set up to work in the same runtime experience
collabviewer-QuickStartGuide.pngImage Added


By the end of this guide you will have a clear understanding of the workflow for creating a new project with the Collab Viewer Template using the Cavrnus platform. This page will walk you through how to configure a new Collab Viewer Template project, package the project for synchronized copresence, and navigate the interactive options within the Space.

Set up the Project

The workflow for using the Collab Viewer Template with the Cavrnus platform is similar to the usage pattern of standard CVT:

  1. Download the CMC-CVT template project from the Cavrnus Web Console.

    1. This template includes the same content as the AEC Collab Viewer template for Unreal Engine 5.2.

    2. The Cavrnus Metaverse Connector has been added to power advanced functionality.

  2. Build your project from this template by adding your own custom content and UI configuration.

    1. Replacing the scene with your content is the fastest path to a collaborative session since the Cavrnus plugin is already pre-configured.

    2. You can also start with an existing project and bring the template content into that, just as with standard CVT. However, this requires more advanced configuration which is covered later in this Knowledge Base.

  3. Add content based on the layers of interaction.

    1. Cavrnus gives additional model import options at runtime. You can improve performance by designing your baseline level to include only the models that every variation might have.

    2. Additional models can be added to the project using the standard CVT model library approach, keeping in mind that user-specific models can be later added using either Datasmith or Holos.

Tip

See the Epic documentation for more details on critical factors for Importing Content to the Collab Viewer .

Package the Project

  1. The Cavrnus platform does not require any special configuration to package the project. It only requires activation of the Cavrnus plugin (already done from step 1).

    1. Simply follow the Epic standard workflow for Packaging Projects using the Unreal Editor built-in tools built to create an executable file package.

  2. Share the executable package with all of the users who will join your collaborative session.

    1. Each person who who joins your collaborative Space will need to run a duplicate application of your project.

    2. While it is possible for each user to package their own build and still connect within the Space, there will be fewer chances for errors if one member of the team packages the project and distributes copies of the executable.

    3. As with a standard Collab Viewer project, each person who joins the Space will need all of the files in the executable folder.

Tip

See the Epic documentation for more information about Packaging Projects, and how you can configure the process.

Connect to a Space

  1. A CVT project powered by Cavrnus does not require a user instance to act as a server.

    1. Each instance connects to the Cavrnus platform, and collaboration takes places within distinct Spaces.

    2. Changes made in one Space do not cross over to affect other Spaces.

    3. You can create as many Spaces as you like, and load the same executable project into each Space with it’s own unique configuration. Each Space has its own Journal which tracks the history of changes made in that Space.

  2. The first differences most users will notice is the user login screen, which prompts the user to login to your domain with a unique ID and password.

image-20240529-130903.pngImage Added
  1. Make sure your team members have access to your domain by creating user profiles in the Administration page of the Web Console.

    1. See Creating and Managing Users.

  2. To connect your team members in a collaborative session, you first create a Space for everyone to join, and then assign roles for each user within that Space.

    1. See Creating and Managing Spaces.

  3. After logging in to your distributed application, users will can find the Space you’ve invited them to in the Cavrnus Lobby.

image-20240529-131316.pngImage Added

Navigate within the Space

  1. The same desktop controls and VR controls natively available in the Collab Viewer Template are also available when using Cavrnus platform.

    1. The Space Bar opens the Iteraction Menu providing various tools to measure, move, and alter the material of an object.

    2. Additional tools are also available, such as scaling and rotating objects, datasmith, and others. More information can be found on the next few pages of this knowledge base.

  2. Once the team is in the Space, you will see the other users logged into the Space as separate avatars.

    1. Just as with standard CVT, each avatar is assigned a unique color and can be identified by the Name label corresponding to their user profile name.

    2. In the Cavrnus-powered CVT, avatars appear as the floating bot with hands in each navigation mode, as seen in the image below.

    3. You may also see a User List on the right side of the screen. This will display each user’s thumbnail image, audio, and screen-sharing controls.

    4. You can toggle this on and off using the F10 key.

image-20240529-132439.pngImage Added
  1. Just as in standard CVT, you can use the top right menu to switch between movement modes: fly, walk, orbit, and VR.

    1. In Walk mode, Cavrnus provides a checkbox option to dynamically set the avatar as a Third Person player character (e.g. Manny or Quinn).

    2. Checking this box from any mode will automatically set the movement mode to Walk.

image-20240529-164446.pngImage Added

  1. From here, the standard CVT controls should look familiar, and will continue to operate the same way with additional Cavrnus functionality on top.

Changes to the Scene at Runtime

  1. One key difference when using the Cavrnus platform is the persistent tracking of states within a unique Space.

    1. Every change you make is logged to the Journal in real-time. There is no need to click a “Save” button.

    2. Changes are persistently available even after all members leave the Space. When a team member loads the project back into that Space, they will find everything exactly where it was left when the last changes were made.

    3. With Cavrnus, you can have an unlimited number of Spaces, so multiple configurations can be stored and reviewed.

    4. Just as before, you can store a state using the default Collab Viewer Template interface. This will move everything to the stored states and update the Journal.

  2. Objects can also be added and removed from the scene to customize the Space.

    1. Add new models to the scene using the Holos format. Holos added this way are pushed to other users and are visible only in the Space in which they were added.

    2. In the same way, boards can be added for display purposes. (See Boards).

  3. The state of all of the objects in the Space can be managed using the the Cavrnus object list.

image-20240529-134843.pngImage Added

Tip

Reference the Epic documentation for more information about Collab Viewer Template desktop and VR controls.

ON THIS PAGE

Table of Contents
minLevel1
maxLevel3
outlinefalse
stylenone
typelist
printabletrue
Auibutton
selectedUrlhttps://cavrnus.atlassian.net/wiki/spaces/CSM/pages/916586497927760732/Cavrnus-CVT+Overview
an.spaceKeyCSM
color#0B2942
filterSpacetrue
destinationconfluencePage
textColorPalettecfm-space-colors-Cavrnus Colors
idpplpcix26kqywf26rn8b2l
typestandard
title<< Previous
textColor#FFFFFF
backgroundColorPalettecfm-space-colors-Cavrnus Colors
urlhttps://cavrnus.atlassian.net/wiki/spaces/CSM/pages/916586497927760732/Cavrnus-CVT+Overview
Auibutton
selectedUrlhttps://cavrnus.atlassian.net/wiki/spaces/CSM/pages/916586687937787393/Cavrnus-CVT%3A++Logging+In+From+An+Application
an.spaceKeyCSM
color#0B2942
filterSpacetrue
destinationconfluencePage
textColorPalettecfm-space-colors-Cavrnus Colors
idlfznotsne7egdlzthwdv4t
typestandard
titleNext >>
textColor#FFFFFF
backgroundColorPalettecfm-space-colors-Cavrnus Colors
urlhttps://cavrnus.atlassian.net/wiki/spaces/CSM/pages/916586687937787393/Cavrnus-CVT%3A++Logging+In+From+An+Application