- Created by Kyle , last modified on May 18, 2024
You are viewing an old version of this page. View the current version.
Compare with Current View Page History
« Previous Version 4 Next »
DO NOT POST LIVE!!!
This is still in development.

Describes requirements and considerations that apply when you connect multiple computers together into a design review experience.
Getting Started
Card : Quick Start
Card: Interacting with the CVT
Networking Requirements
NOTES FROM THE UE WEBSITE - REMOVE BEFORE PUBLISHING!
This page contains detailed, step-by-step instructions for getting started with the Collab Viewer Template on your local network with its default content. By the end of this page, you'll know how to start up the runtime experience the Collab Viewer Template provides for you, what your options are for interacting and moving around the scene, and how to get multiple other people on your network to join the same shared experience with you.
The workflow here uses the AEC Collab Viewer template as an example, but the workflows function equally well for the OEM/Manufacturing template.
1 - Packaging and Distributing
To take advantage of all the features of the Collab Viewer Template, you'll first need to package your Project to an .exe file. When you want multiple people to connect to a single session, each person needs to run the application from a copy of that packaged .exe file. Therefore, one person on the team needs to package the Project from the Unreal Editor, then distribute that .exe file to everyone else who you need to join the same session.
To package and share your Project:
Create a new Project from the Collab Viewer Template, if you haven't already, and open it in the Unreal Editor.
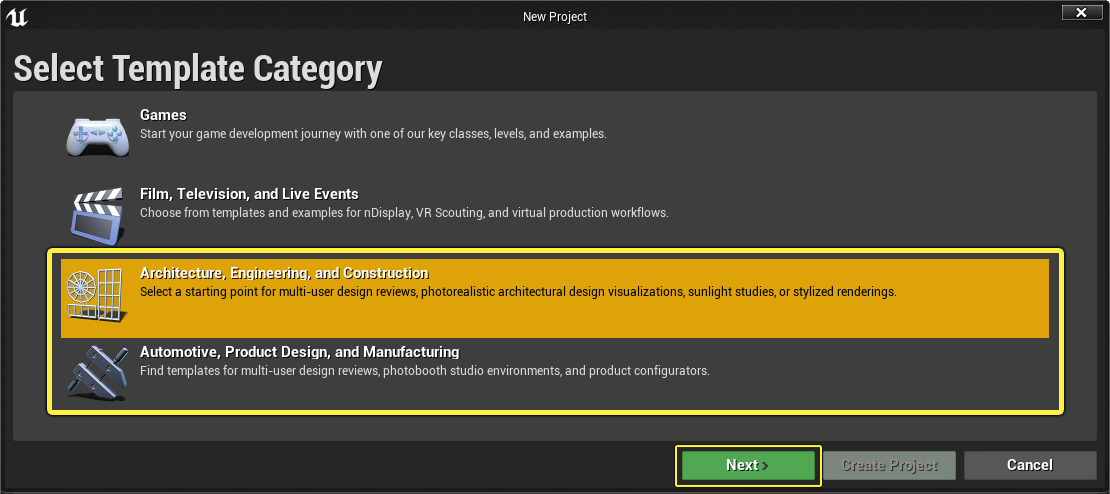
Select a template category.
Select the Collab Viewer template.
Select Create Project .
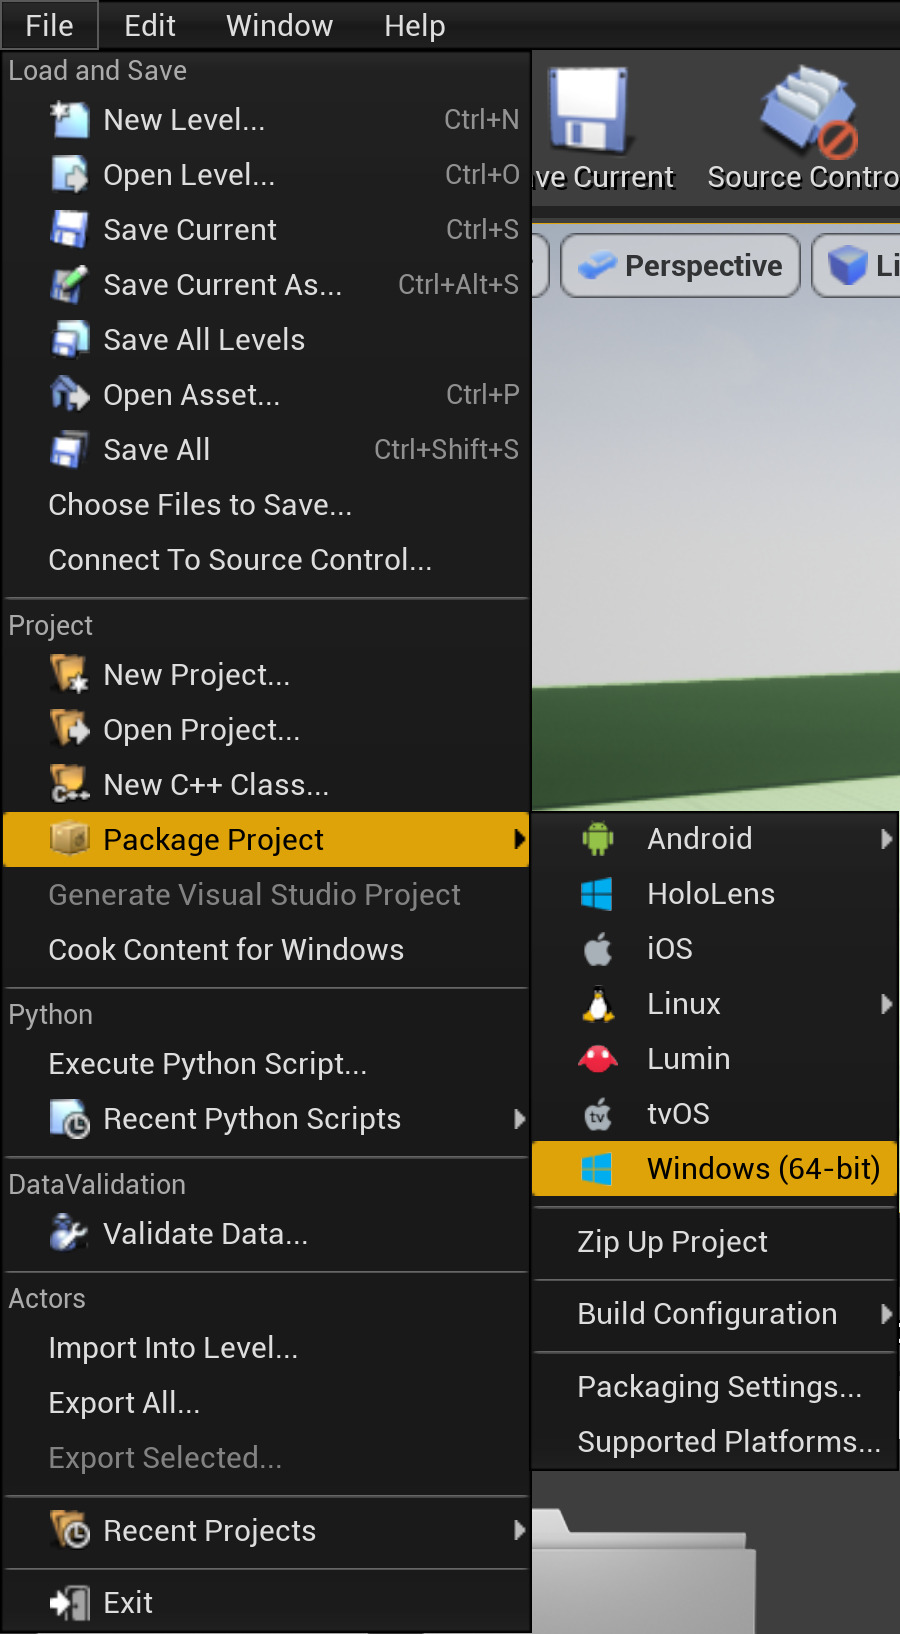
From the main menu, choose File > Package Project > Windows (64-bit).
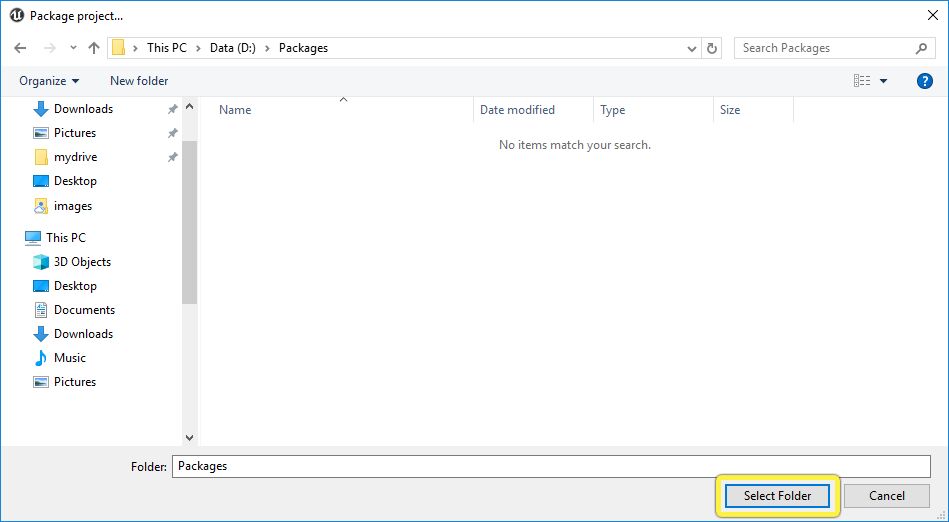
Browse to the folder on your computer where you want the Unreal Editor to place the packaged version of your Project, and click Select Folder .
The Unreal Editor begins the packaging process.
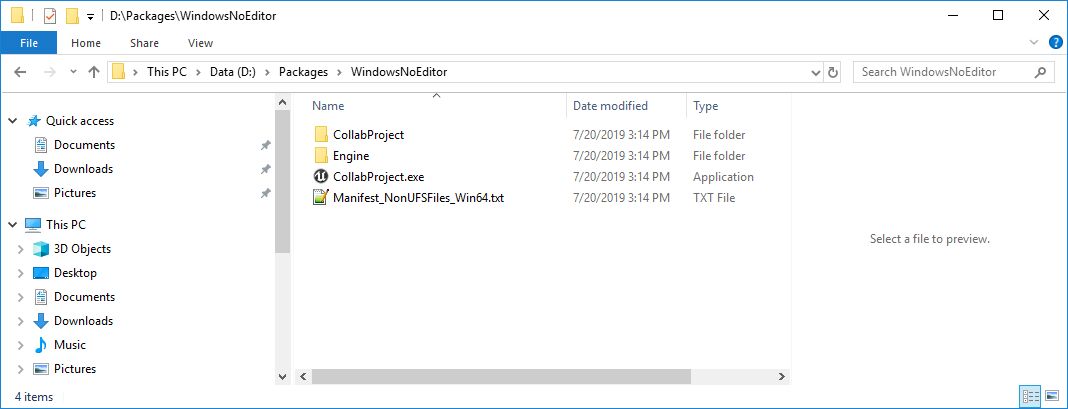
When the packaging process is finished, go to the folder that you selected in step 3 above. You'll find a folder called WindowsNoEditor with contents similar to the following:
Each person who wants to join the same session in the Collab Viewer will need to have all of the files in this folder on their local computer. It's up to you how best to achieve this for your organization.
For example, you could zip up the files in this folder and place the archives in a shared location on your local network. Other users could then copy them to their computer and extract them.

For more information about packaging, and how you can configure the process, see also Packaging Projects .
You must follow this packaging and distribution process each time you change the content in your Project. The 3D models in your Level are not replicated automatically between networked users; they are compiled into the packaged application. In order for everyone in a session to see the latest content, everyone needs to be using the same version of the packaged application.
Finished Step
2 - One Person Starts a Server
In this step, you'll start up a server—a special instance of the Collab Viewer application that other people can connect to.
Double-click the .exe file for your packaged application.
In the example below, the Project is named CollabProject , so its packaged application is named CollabProject.exe .In the welcome screen, set a display name for yourself. This name appears above the head of your avatar, so that other people in the same session can identify you.
Click the arrow to go to the next step.
Leave the next setting at its default value of Host a session .
Click the arrow to complete the server setup.
If you only want to use the Collab Viewer Template to make a single-person experience without the ability for other users in your network to join in, you could instead choose the Single Session option here. It gives you exactly the same runtime experience as starting as a host, except that your application doesn't become visible to other people in your network.


You'll start in the main sample Level.
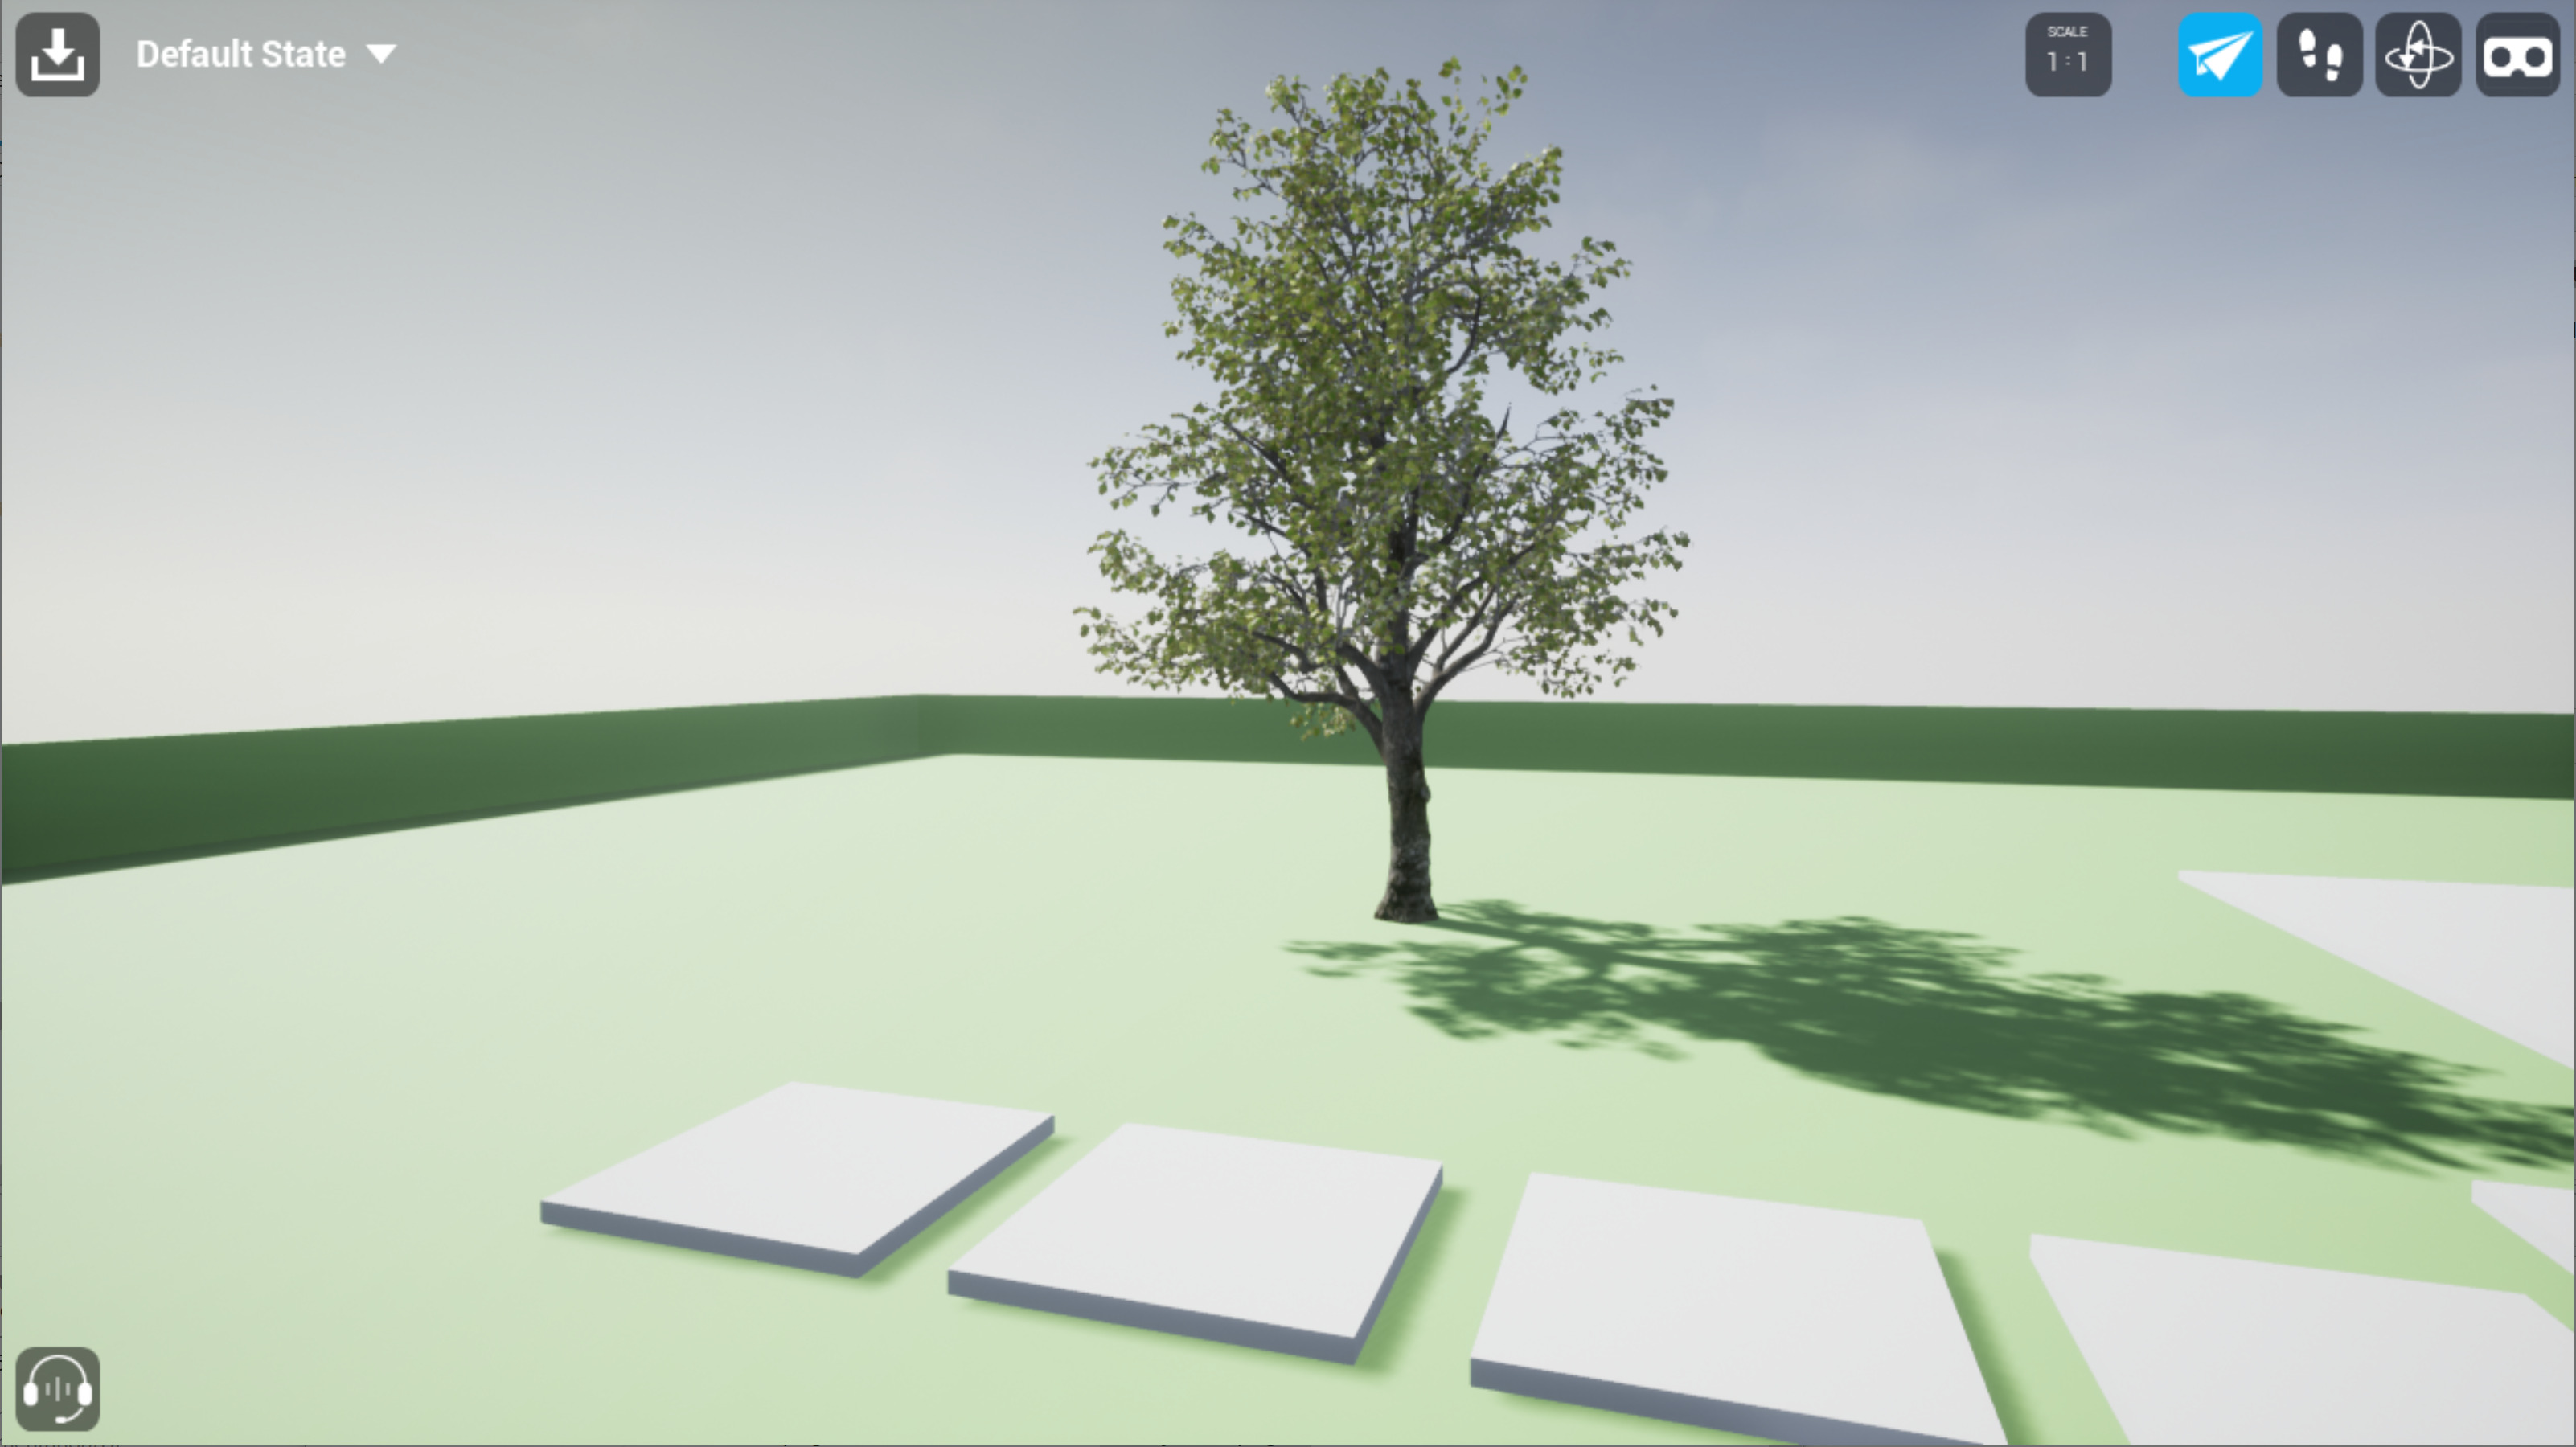
Use the desktop controls or VR controls to move around the scene and interact.
You can press the Spacebar key (or either thumbstick button in VR) to open an Interaction Menu that lets you make selected objects transparent ( Xray ), teleport to preset Bookmark locations, move objects around in 3D space, scale your viewpoint, cut and remove a section of the geometry, or load new Datasmith assets during runtime.
You can also use the menu at the top right to switch between different movement modes—fly, walk, orbit—and, if you have a compatible VR headset set up, to switch into VR.


To learn more, see:
While you're working, your computer becomes visible as a server to other computers in your network. As other people join your session, you'll see their avatars appear.
Finished Step
3 - Other People Join
In this step, each person who joins the session launches a separate instance of the packaged application on a different computer, and they all connect to the same server.
Each individual should follow these instructions to join the session:
Double-click the .exe file for your packaged application. For example, in this case, the Project is named CollabProject , so its packaged application is named CollabProject.exe .
In the welcome screen, set a display name for yourself. This name appears above the head of your avatar, so that other people in the same session can identify you.
Click the arrow to go to the next step.
Change the next setting to Join a session .
Click the arrow to go to the next step.
The application scans the network, and lists all available servers.
If you see the server you want in the list, click its name to join the session.
If you don't see the server you want, try the Refresh button to re-scan the network for servers.
If the application can't detect the server, but you know its IP address, activate the Manually specify an IP Address switch.
Enter the IP address in the field provided, and click Join .
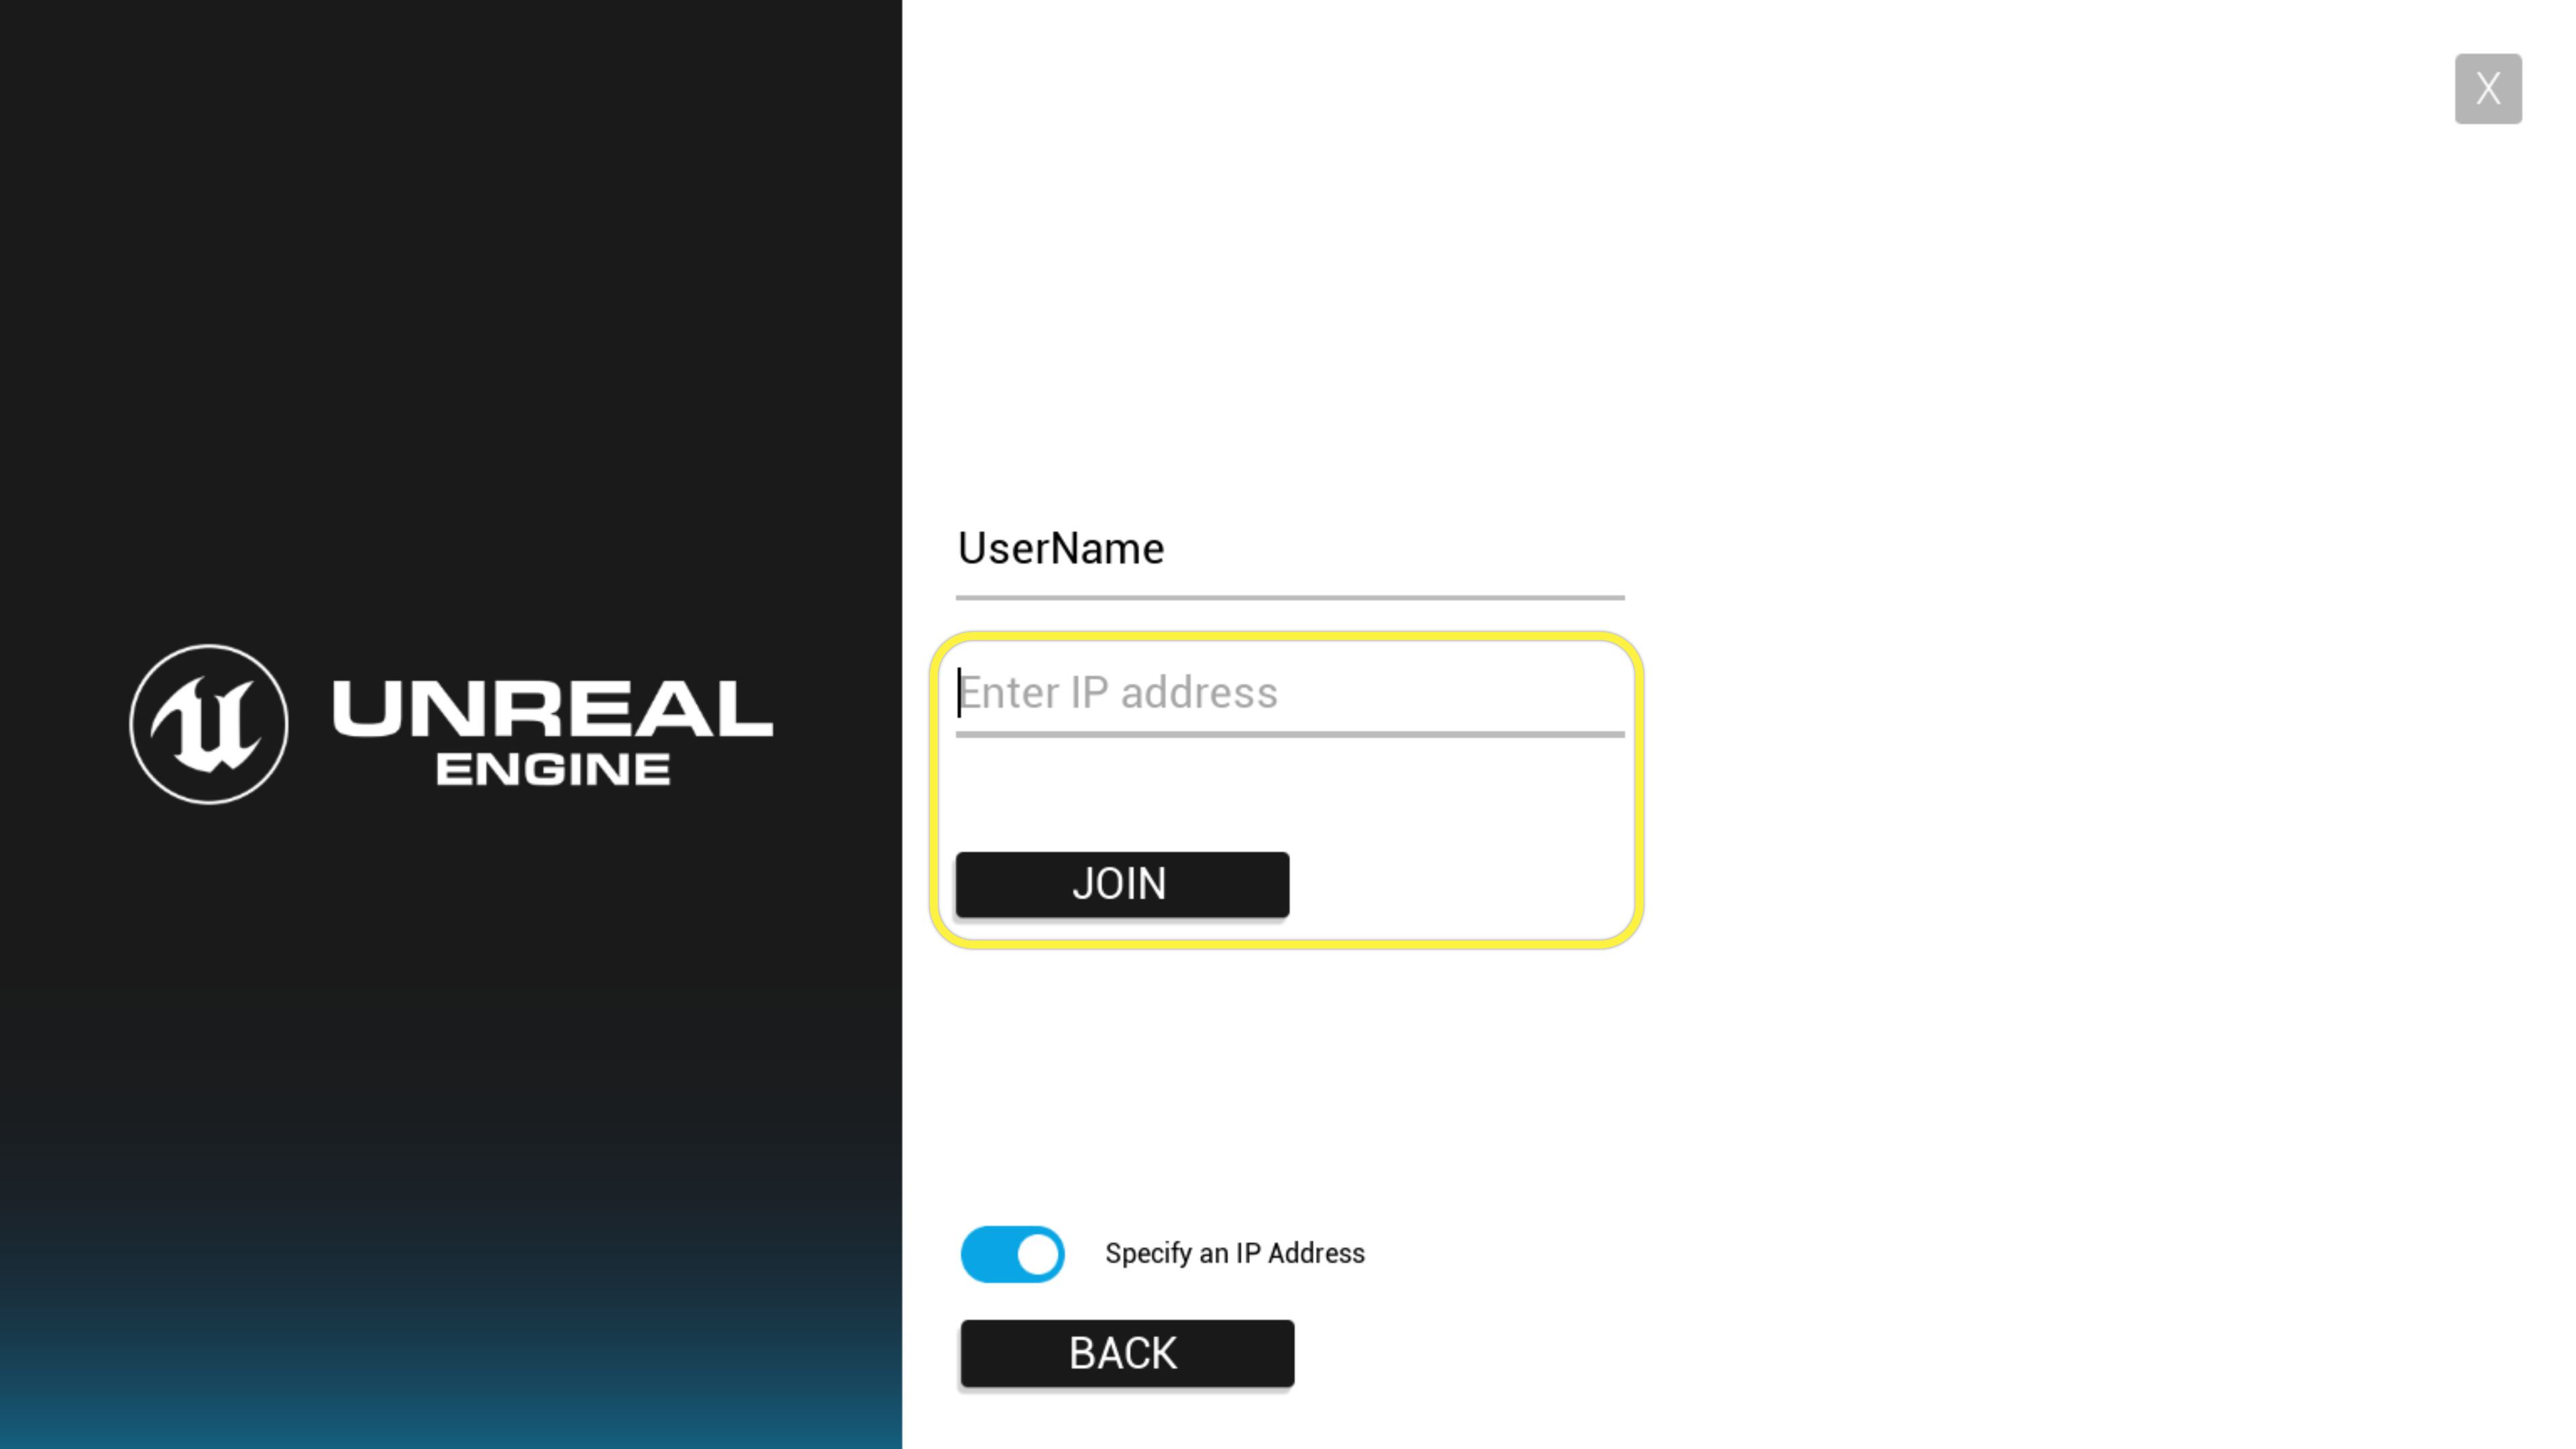


You'll start in the main Level. You'll be able to see an avatar for the person running the server, and one for each other person who joins the session:
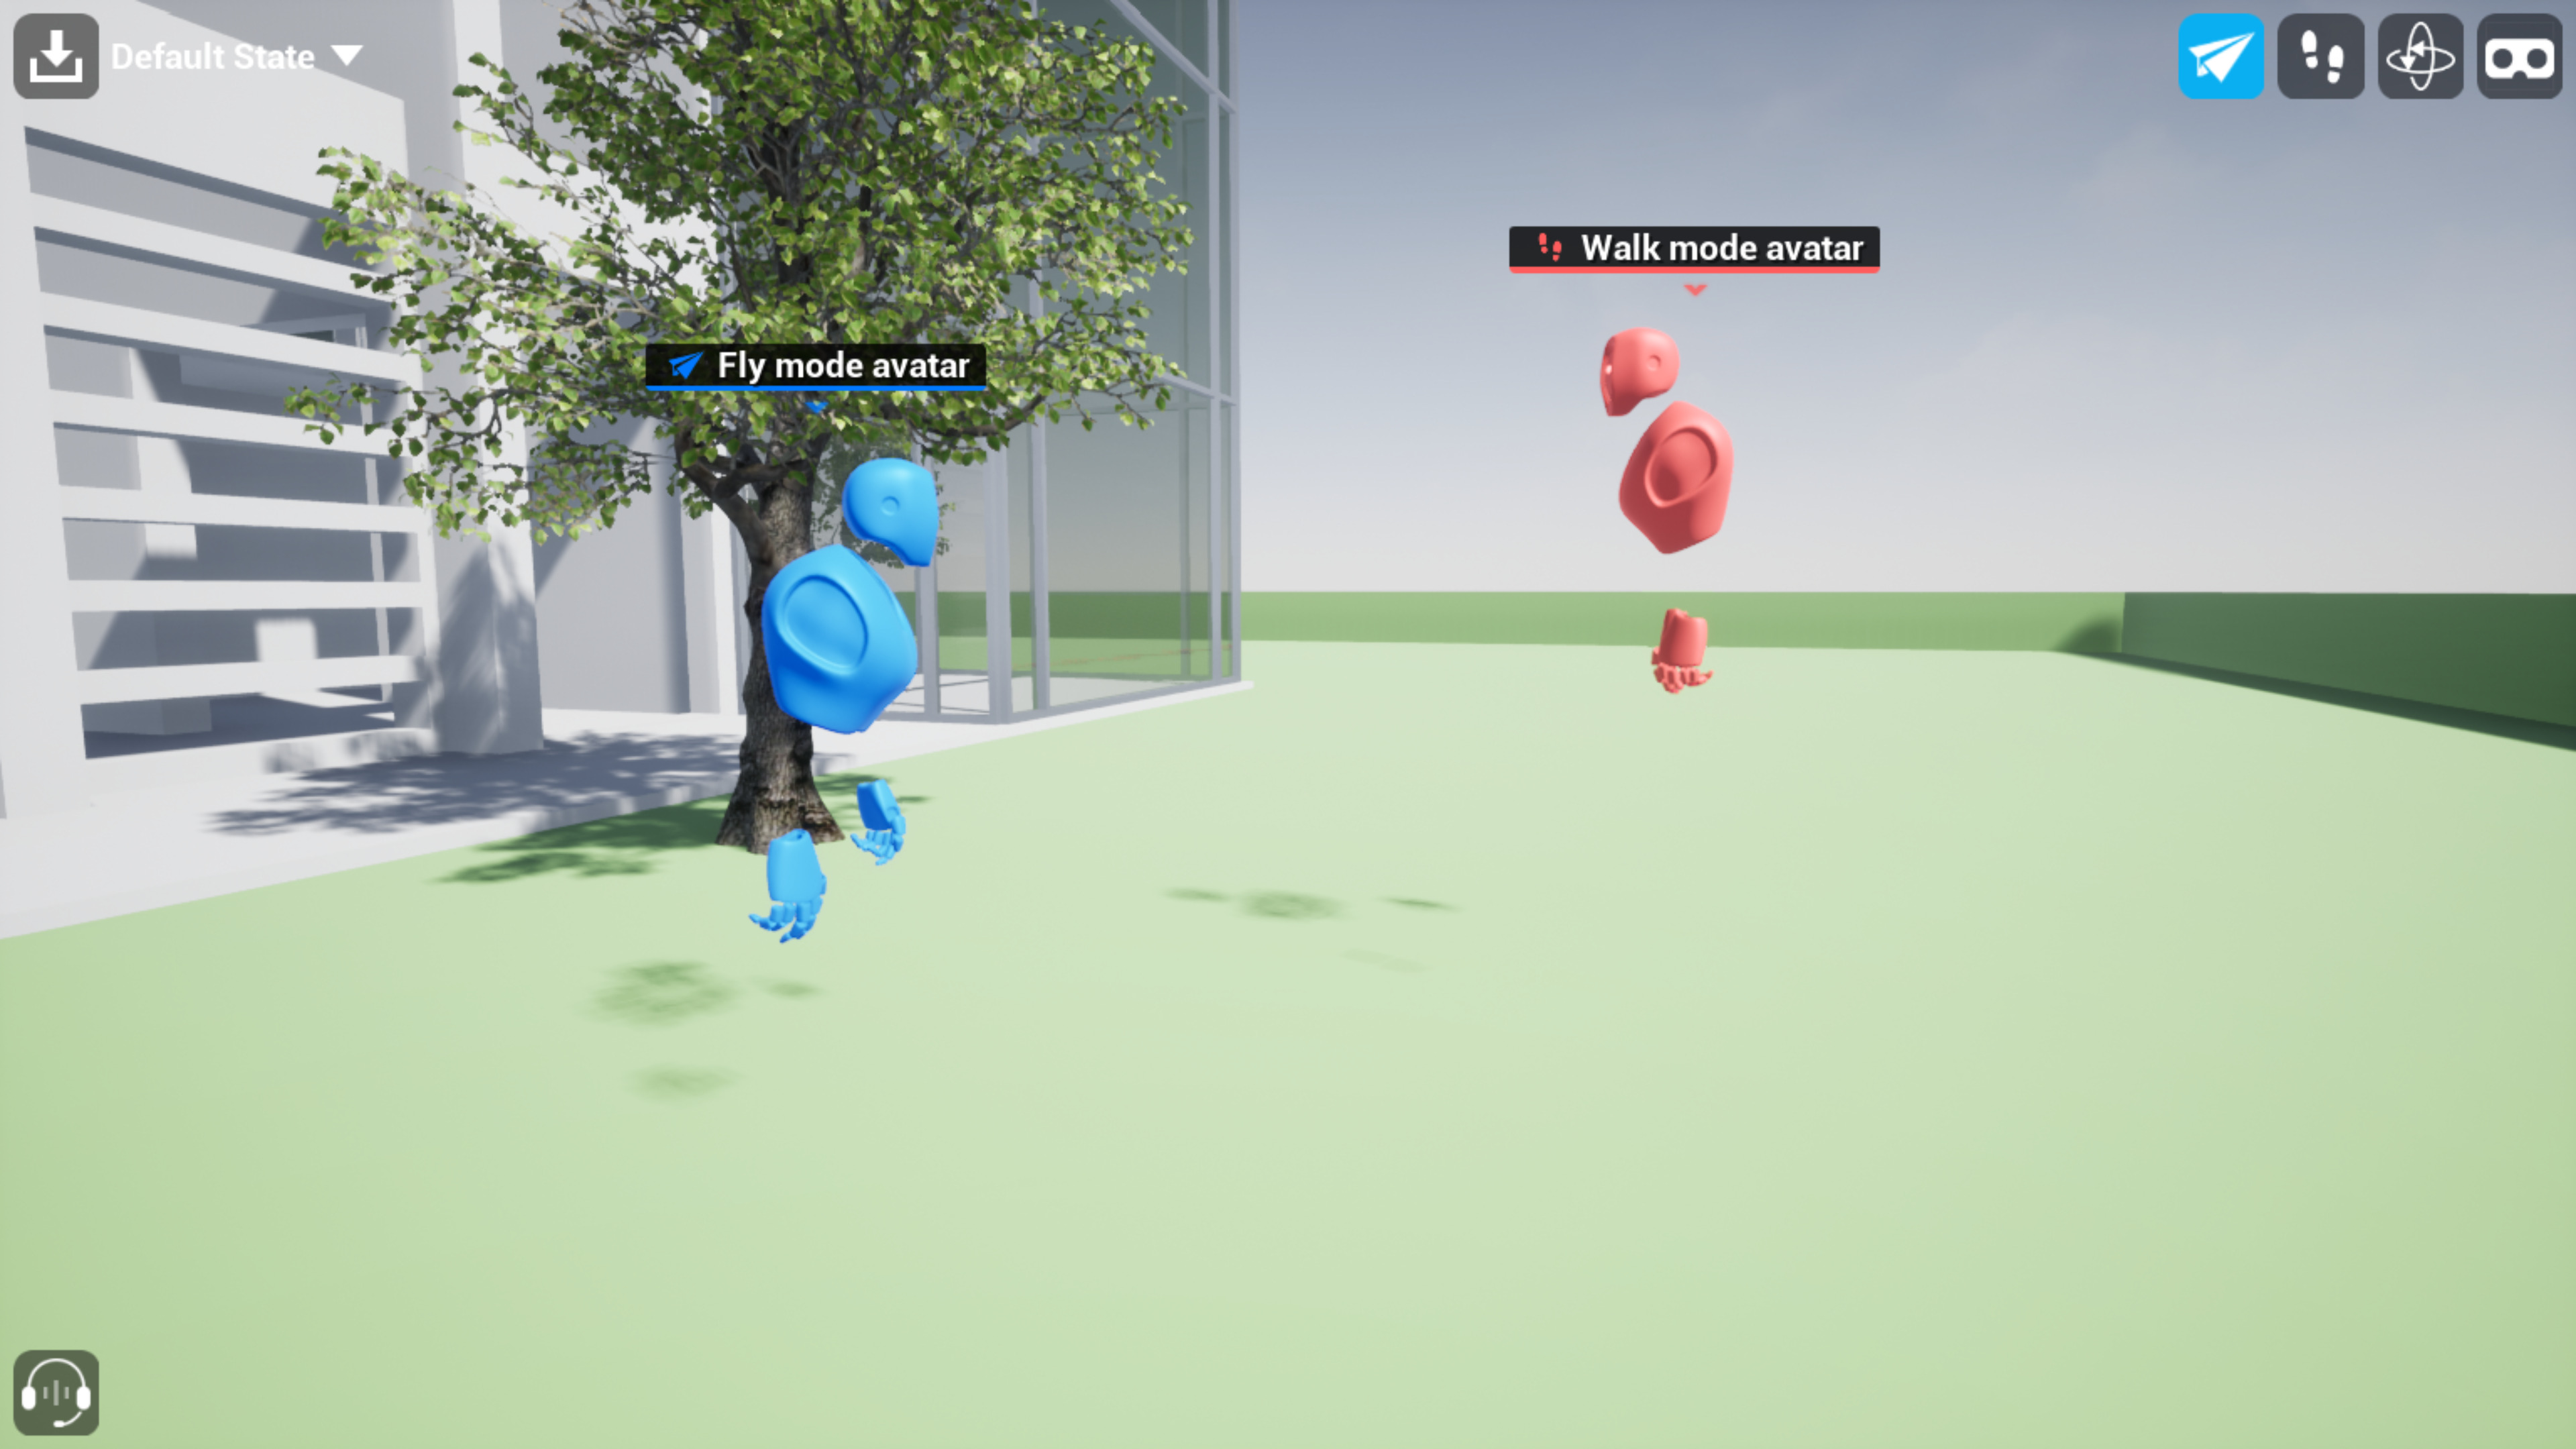
The avatars are slightly different for each user:
Each avatar is accompanied by the display name its user entered in the welcome menu.
Each avatar is assigned a random color.
Users in the Walk and VR modes have an avatar that resembles a human shape as on the right in the image above. Users in other navigation modes are represented by a camera as on the left in the image above.
All avatars move and rotate around the scene as their corresponding user moves and looks around, so that you can see where other users are focusing their attention.
Use the desktop controls or VR controls to move around the scene and interact.
Finished Step
4 - On Your Own
Now that you understand how to run the Collab Viewer Template and connect with others, you're ready to get started using the same runtime experience to review your own content. Continue on with the instructions in the Adding Your Own Content to the Collab Viewer Template guide for instructions on getting your own content added to the Project and set up to work in the same runtime experience.
ON THIS PAGE
- No labels